I was halfway through a client call when I heard that unmistakable scritch—the sound of a seam finally giving up the ghost on my favorite pair of dark indigo denim. My first instinct wasn’t to mourn the loss, but to reach for my sewing kit; I’ve spent enough time tinkering with vintage synths to know that a little bit of targeted repair is almost always better than a total replacement. Most people think you need a professional tailor or a complicated sewing machine to fix a fray, but learning how to patch jeans is actually a much simpler, more rewarding process than the “fast fashion” crowd wants you to believe.
I’m not here to sell you on some elaborate embroidery project or a way to turn your pants into a DIY art piece. This guide is about functional repair—the kind of quick, sturdy fixes that keep your clothes in rotation and out of the landfill. I’m going to walk you through the most efficient ways to handle holes and thinning fabric using basic tools you likely already have in a kitchen drawer. We’re going to focus on methods that are built to last, so you can fix the problem, stop worrying about your wardrobe, and get back to your actual life.
Guide Overview
Tools & Supplies
- Fabric scissors for cutting patch shapes
- Sewing needle for hand stitching or machine sewing
- Pins to hold the patch in place
- Denim scrap or patch fabric (1 piece)
- Thread matching the denim color (1 spool)
Step-by-Step Instructions
- 1. First, clear your workspace and gather your gear. You don’t need a professional sewing kit, but you do need a needle, some heavy-duty thread (denim thread is best, but any strong cotton will do), and a piece of scrap fabric. I usually keep a small tin of these supplies in my desk drawer for exactly this reason. Don’t overcomplicate the prep; just make sure your scissors are actually sharp so you aren’t fraying the edges more than necessary.
- 2. Clean up the damage. If there are any loose, dangling threads around the hole, trim them away. If the hole is particularly jagged, you might want to trim the edges into a slightly cleaner shape. It’s tempting to just start sewing immediately, but trimming the mess first ensures your patch actually sits flat against the denim instead of bunching up into a lumpy disaster.
- 3. Prep your patch material. Take your scrap fabric—ideally something with a similar weight to your jeans—and cut it so it’s about an inch larger than the hole on all sides. If you want that “visible mending” look that’s popular right now, go for a contrasting color or a fun pattern. If you’re aiming for something more discreet, try to match the color as closely as possible to the original denim.
- 4. Position and pin. Lay your jeans flat on a hard surface. Place the patch piece underneath the hole so the good fabric is sandwiched between the patch and the denim. If you have sewing pins, use them to hold everything in place. If you’re working on a particularly thick pair of heavy-duty work jeans, you might find it easier to just hold it steady with your non-dominant hand, but pins are your best friend for preventing the fabric from shifting mid-stitch.
- 5. Start the stitching. I prefer the “running stitch” for beginners because it’s straightforward and functional. Thread your needle and knot the end, then start about half an inch away from the edge of the hole. Move the needle in and out of the fabric in small, consistent increments. Don’t try to go too fast; the goal is a tight, even tension that secures the patch without puckering the surrounding denim.
- 6. Secure the edges. Once you’ve stitched all the way around the perimeter of the hole, make sure you’ve overlapped the original edges of the denim onto the patch. This creates a reinforced seal. When you reach the end, tie off your thread with a couple of small knots on the underside of the patch. Give it a firm tug to make sure it’s secure, then snip the excess thread.
- 7. The stress test. Before you head out, put the jeans on and move around a bit. Sit down, bend your knees, and make sure nothing feels itchy or overly tight. If the patch feels loose, it’s better to add a few more stitches now than to have the whole thing unravel while you’re out running errands. Once it feels solid, you’re done—get back to your day.
Stop Tossing Good Denim How to Patch Jeans and Keep Living
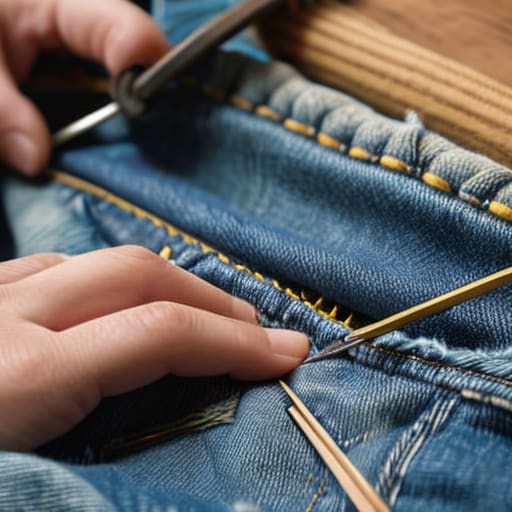
Before you start sewing, let’s talk about the “why” and the “how” of your approach. If you’re looking for a quick fix for a small fray, knowing how to use iron-on patches can save you a lot of frustration, especially if you aren’t particularly confident with a needle and thread. It’s a functional, low-effort way to stop a hole from spreading before it ruins the whole garment. However, if you’re dealing with a structural issue—like a blowout in the crotch or a split along the hip—you’ll likely need to focus on repairing denim seams to ensure the tension doesn’t just rip the fabric again the next time you sit down.
If you prefer a more intentional look, I’ve grown quite fond of visible mending techniques. Instead of trying to make the repair invisible (which is a losing battle with heavy denim), lean into it. Use a contrasting thread color or a sturdy fabric patch for jeans to create a design that tells a story rather than hiding a flaw. It turns a “broken” item into something unique. Just make sure you have the right denim sewing supplies on hand—specifically heavy-duty needles and polyester thread—because standard cotton thread simply won’t hold up to the daily wear and tear of a good pair of jeans.
Real Tools for Real Messes Essential Denim Sewing Supplies
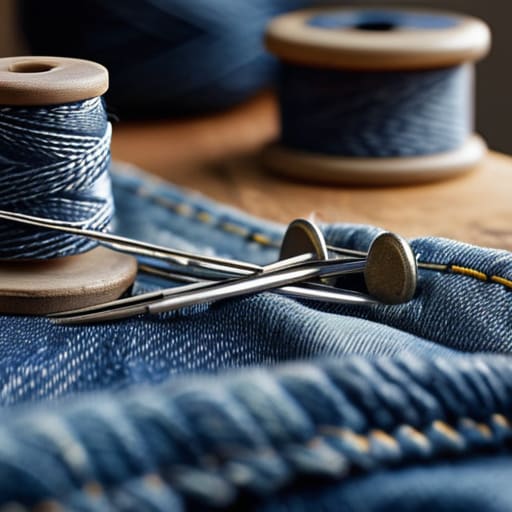
Look, you don’t need a professional tailor’s studio to fix a pair of Levi’s, but you also shouldn’t be trying to eyeball this with a dull kitchen needle and some mismatched thread. If you want a repair that actually holds up after three trips through a heavy-duty wash cycle, you need to invest in a few decent denim sewing supplies. I always keep a small kit in my desk—not for emergencies, but for maintenance. Grab a pack of heavy-duty denim needles (size 90/14 or 100/16) and some thick, polyester-core thread. Cotton thread is fine for a linen shirt, but it’ll snap under the tension of denim like a dry twig.
If you aren’t feeling particularly crafty, how to use iron-on patches is a perfectly valid shortcut for those small, pesky holes in non-stress areas. They’re great for a quick fix, but if you’re dealing with a blowout in the inner thigh or a heavy-wear spot, you’ll want to look into darning denim holes instead. Darning creates a structural web of thread that actually reinforces the fabric rather than just covering it up. It takes a bit more patience, but it’s the difference between a temporary bandage and a permanent solution that lets you stop worrying about your clothes and start wearing them again.
Beyond the Quick Fix Darning Denim Holes and Repairing Seams
If you’ve moved past the basic adhesive method and are looking for something that actually holds up to a heavy-duty laundry cycle, it’s time to talk about darning. While knowing how to use iron-on patches is fine for a temporary fix on a Friday night, those patches eventually peel or create a stiff, uncomfortable lump. Darning denim holes is a different beast entirely; it involves weaving thread back and forth across the gap to create a new “fabric” where the original has failed. It takes a bit more patience and a steady hand—think of it like troubleshooting a complex piece of legacy code—but the result is a structural repair that integrates with the garment rather than just sitting on top of it.
When you’re dealing with structural failures rather than just surface wear, you have to look at the construction. Repairing denim seams requires a much more intentional approach than a simple patch. If a seam is splitting, you aren’t just covering a hole; you’re reinforcing the very skeleton of the jeans. I usually recommend using a heavy-duty topstitching thread to match the original factory finish. It’s not about making the repair invisible; it’s about making it functional so you aren’t constantly worrying about the seam giving way while you’re out running errands.
Functional Style Mastering Visible Mending Techniques and Fabric Patches
If you’ve reached the point where a standard repair feels too clinical, it’s time to lean into the aesthetic. I’ve always preferred things that show a bit of history—much like my vintage synths, a well-worn pair of jeans tells a story. Instead of trying to hide the damage, try embracing visible mending techniques. Using a contrasting thread color or a patterned scrap of fabric doesn’t just fix the hole; it turns a flaw into a design choice. It’s a way to reclaim your clothes from the cycle of fast fashion and make them uniquely yours.
If you aren’t quite ready to pick up a needle, don’t overlook the utility of a high-quality fabric patch for jeans. When using an iron-on option, the trick is in the preparation: clean the area thoroughly and apply firm, even pressure. I’ve found that even if you use an iron-on patch for the structural reinforcement, following it up with a few hand-stitched rows around the edges makes the repair significantly more durable. It’s about building a system that lasts, ensuring you spend less time troubleshooting your wardrobe and more time actually wearing it.
Five Rules for Repairs That Actually Last
- Don’t skimp on the thread. If you try to patch heavy denim with flimsy sewing thread, you’ll be back at the sewing machine in a week. Grab a heavy-duty polyester or a dedicated denim thread; it needs to stand up to the friction of real life.
- Clean the area first. It sounds trivial, but if you’re sewing over grit or loose lint, your patch won’t sit flush and your stitches will eventually cheese-wire right through the fabric.
- Iron your patches. I know, it feels like an extra step, but pressing your patch flat before you start sewing ensures it stays aligned and prevents the fabric from bunching up in a way that makes the repair look messy and amateur.
- Mind the tension. If you pull your stitches too tight, you’ll pucker the denim and create a new problem. You want the patch to move with the jeans, not turn them into a stiff, uncomfortable piece of armor.
- Always trim the fraying. Before you lay down your patch, take a pair of sharp scissors and trim away the loose, dangling threads around the hole. It makes the workspace cleaner and ensures your stitches are anchoring into solid fabric, not just air.
The Bottom Line
At the end of the day, patching your jeans isn’t about achieving some Pinterest-perfect aesthetic; it’s about functional maintenance. Whether you opted for a quick patch to get through a busy work week, used darning to reinforce a thinning seat, or leaned into visible mending to make a statement, you’ve successfully interrupted the cycle of mindless consumption. You now have the tools—from the right needles to the correct scrap fabric—to handle a tear without needing to run to the mall or toss a perfectly good pair of denim into the landfill. It’s a simple, repeatable system that keeps your wardrobe working for you, rather than the other way around.
I know it feels like just another thing on the to-do list, but there is a quiet, underrated satisfaction in fixing what is broken. We spend so much of our lives troubleshooting digital glitches and managing endless notifications that we often forget how grounding it is to work with our hands on something tangible. By taking twenty minutes to mend a hole, you aren’t just saving a pair of pants; you are reclaiming a bit of your own agency. So, grab your needle, find a good light, and get it done. Once the repair is finished, the gear is ready, and you can finally get back to living.
Frequently Asked Questions
How do I stop the hole from getting bigger while I'm working on the patch?
The simplest way to stop the fraying is to stabilize the area immediately. Don’t just dive in with a needle; grab some lightweight fusible interfacing—the kind you iron on—and place it on the inside of the denim. It acts like a temporary scaffold, holding the loose threads in place so they don’t unravel further while you’re stitching. If you’re mid-repair and don’t have an iron handy, a quick zigzag stitch around the perimeter of the hole will do the trick.
Can I use iron-on patches if I don't want to deal with a needle and thread?
You can, but let’s manage expectations. Iron-on patches are great for a quick cosmetic fix, but they aren’t a permanent structural repair. If you’re dealing with a tiny fray, an iron-on patch works fine. But if there’s an actual hole, the heat and tension will eventually cause the patch to peel or the denim to tear around the edges. If you’re skipping the needle, at least use a fabric glue for extra stability.
Will my jeans still look like a mess after I've patched them, or can I make it look intentional?
Look, if you’re aiming for “factory perfect,” you’re fighting a losing battle. But there’s a massive difference between a sloppy repair and intentional mending. If you use a contrasting thread or a decorative patch, it looks like a design choice, not a mistake. If you want them to look seamless, match your thread color exactly and keep your tension even. Either way, stop worrying about perfection; a well-mended pair has more character than something off a rack.
How do I fix a hole that's right on the seam where the fabric is fraying?
Seam fraying is a bit more technical than a standard hole, but don’t panic. You can’t just patch over it; you have to stabilize the edge. First, trim away the loose, messy threads. Then, use a small piece of sturdy scrap fabric—cotton or denim works best—and place it on the inside of the jeans. Stitch through both layers using a tight zigzag or whipstitch to “lock” the fraying edge in place. It’s about reinforcement, not just coverage.