
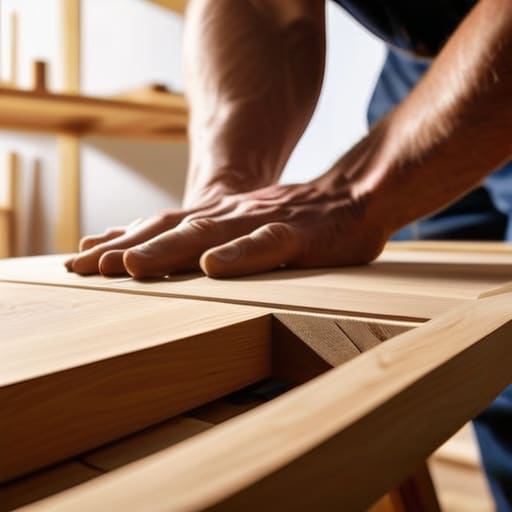
I was staring at a stack of leaning paperbacks and a half-empty box of IKEA scraps last Tuesday, wondering why I felt like my entire home office was slowly collapsing under the weight of my own disorganized life. Most DIY blogs want to convince you that learning how to build a bookshelf requires a master carpenter’s degree and a workshop full of expensive, shiny power tools you’ll never use again. But here’s the truth: you don’t need a showroom-ready masterpiece; you just need a sturdy structure that doesn’t wobble every time you pull a heavy hardcover off the middle shelf.
I’m not here to sell you on a Pinterest-perfect aesthetic that requires three weeks of sanding and a soul-crushing amount of wood stain. Instead, I’m going to walk you through a streamlined, functional approach to building something that actually works. We’re going to focus on the essential mechanics—measuring once so you don’t waste money, choosing materials that won’t sag, and the simple assembly steps that ensure your books stay exactly where you put them. Let’s stop overcomplicating the process and just get it done right the first time.
Guide Overview
Tools & Supplies
- Drill/Driver for driving screws and pilot holes
- Circular Saw or Hand Saw for cutting wood to size
- Measuring Tape for precise layout
- Sandpaper for smoothing surfaces
- 1×4 or 1×2 Pine Boards (approx. 4-5 boards)
- 1/4 inch Plywood (1 sheet for the back)
- Wood Screws (1 box of 1.25 inch)
- Wood Glue (1 bottle)
Step-by-Step Instructions
- 1. Before you even touch a saw, you need a solid plan. Grab that notebook of mine and sketch out the dimensions, but don’t get caught up in “Pinterest-perfect” aesthetics. Measure your actual books—specifically the heavy ones you aren’t planning to move for a decade—and ensure your shelf depth can accommodate them without them overhanging the edge. Once you have your dimensions, make a precise cut list so you aren’t wandering aim of the hardware store three times because you forgot a single piece of plywood.
- 2. Head to the lumber yard and pick out your materials, but listen closely: avoid the cheap, particle-board nonsense if you actually want this to last. I prefer using high-quality birch plywood or solid pine; it’s much more forgiving when you’re making a mistake and far more stable in the long run. While you’re there, grab a box of wood screws, some wood glue, and a pack of sandpaper. If the wood looks bowed or warped in the store, leave it on the shelf—don’t try to fight physics later at home.
- 3. Now, let’s get to the cutting. If you don’t own a table saw, don’t panic; most big-box hardware stores will make your primary cuts for you for a small fee. I find this is a great way to ensure your long vertical sides are perfectly straight. Once you have your pieces, sand every single edge before you start assembling. It is much easier to smooth out a flat board now than it is to try and reach into a tight corner once the structure is already built.
- 4. Time to build the carcass. Apply a thin, even bead of wood glue to the edges where the horizontal shelves meet the vertical sides. This is the step most people skip, but glue is what actually provides the structural integrity; the screws are just there to hold everything in place while the glue dries. Align your pieces, pre-drill your pilot holes to prevent the wood from splitting, and drive your screws in. If you don’t pre-drill, you’re just asking for a splintered mess.
- 5. Once the main frame is standing, you need to add a back panel. I know, it feels like an extra step, but a thin sheet of plywood nailed to the back is the only thing that will prevent your bookshelf from leaning like the Tower of Pisa. Trace the back of your unit onto a sheet of 1/4-inch plywood, cut it out, and nail it into the rear edges of your frame. This “squares up” the whole project and makes it feel like a solid, professional piece of furniture rather than a flimsy DIY experiment.
- 6. Finally, we deal with the finish. If you’re like me and just want the thing to work, a simple clear matte sealant or a basic wood stain is plenty. Wipe away any excess glue with a damp cloth immediately—once it dries, it’s a permanent headache to sand off. Let it cure completely in a well-ventilated area before you even think about loading it up with your library. A little patience here ensures you won’t be troubleshooting a sticky, unfinished surface for the next month.
Ditch the Clutter How to Build a Bookshelf That Lasts

Once the structural work is done, don’t just shove it into a corner and call it a day. A bookshelf is only as good as its ability to handle the weight of your actual life—and let’s be honest, that usually means heavy hardcovers and a few random objects you forgot to put away. If you want real shelf stability and support, pay close attention to your spacing. I’ve seen too many people build beautiful units only to have the middle shelves bow into a sad U-shape within six months. If you’re planning for heavy volumes, don’t be afraid to add a center vertical support or use thicker stock; sturdiness beats aesthetics every single time.
The final stretch is where most people lose steam, but it’s actually the most satisfying part. When you get to the stage of finishing wood surfaces, resist the urge to go overboard with high-gloss lacquers that make everything look like cheap plastic. A simple, matte wax or a thin oil finish respects the grain and feels much more intentional. And please, for the love of sanity, don’t skip the step of mounting shelves to the wall. Even the most solid build can feel precarious if it’s top-heavy. Anchoring it isn’t just about safety; it’s about making the piece feel like a permanent, reliable part of your home.
Real Woodworking Tools for Beginners Who Value Function
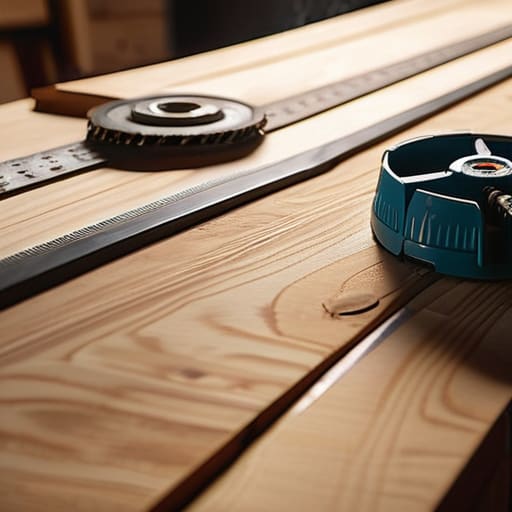
Look, you don’t need a professional-grade workshop or a garage full of expensive, dusty machinery to get this done. I’ve seen too many people stall out because they think they need a $500 table saw just to start. If you’re looking for woodworking tools for beginners, stick to the essentials that actually move the needle. A decent cordless drill, a reliable circular saw, and a solid tape measure are your bread and butter. My rule of thumb? If a tool doesn’t serve a repeatable, functional purpose in your project, leave it on the store shelf. We aren’t building a museum piece; we’re building something that holds your heavy hardcovers without buckling.
When it comes to the actual execution, don’t skimp on your measuring tape or your square. Most DIY disasters aren’t caused by bad luck; they’re caused by sloppy math. Precision during the measuring and cutting wood phase is what separates a sturdy unit from a leaning tower of plywood. I always keep my physical notebook handy to jot down dimensions as I go—digital notes are great until you’re covered in sawdust and can’t find your phone. Once the structure is sound, focus on the basics of finishing wood surfaces so the grain looks intentional rather than accidental. Keep it simple, keep it accurate, and you’ll save yourself a massive headache later.
Mastering Measuring and Cutting Wood Without the Stress
Look, I’ve seen enough “easy DIY” videos to know that the moment you pick up a saw, your heart rate starts to climb. We’ve all been there—staring at a piece of expensive lumber, terrified that one wrong move is going to turn a weekend project into a very pricey pile of firewood. The secret to measuring and cutting wood without a meltdown isn’t about having a steady hand; it’s about slowing down your internal processor. Before you even touch a blade, double-check your math. I always tell my clients that measure twice, cut once isn’t just a cliché; it’s a fundamental fail-safe. If the numbers don’t add up on paper, they definitely won’t work in your living room.
When you finally move to the cutting phase, don’t try to rush the process to save time. That’s how you end up with jagged edges that make the whole unit look amateur. If you’re using basic woodworking tools for beginners, like a simple hand saw or a circular saw, focus on your line. Use a sharp pencil—not a blunt crayon—and draw your cut clearly. I find that clamping your wood firmly to a stable surface is the difference between a clean, professional edge and a frustrating, crooked mess. It’s about creating a controlled environment so you can focus on the task, not the chaos.
Securing Shelf Stability and Support for Real Life
Look, there is nothing more demoralizing than spending a Saturday afternoon building something, only to watch it sag under the weight of a few heavy hardcovers by next Tuesday. If you’ve followed my previous steps on measuring and cutting wood, you’ve got the skeleton ready, but now we need to talk about the structural integrity. To ensure long-term shelf stability and support, you can’t just rely on a few nails and a prayer. I always recommend using pocket hole joinery or even simple wooden dowels to reinforce your corners. It’s a small extra step that prevents that dreaded “leaning tower of literature” effect once you actually start loading it up.
Once the frame is solid, don’t forget the most important safety step: mounting shelves to wall studs. Even the sturdiest custom unit becomes a hazard if it’s top-heavy and unanchored. I’ve seen too many “functional” projects end up as a pile of splinters on the floor because someone skipped the L-brackets. Grab a stud finder, find those solid points, and anchor that unit like your life depends on it—or at least like your collection of vintage manuals does. It’s not about being paranoid; it’s about building something that actually stays put.
Five Ways to Keep Your Shelf from Becoming a Total Disaster
- Measure your actual books, not your “ideal” ones. I’ve seen too many people build beautiful, narrow shelves only to realize their oversized art books or chunky hardcovers won’t fit. Measure your tallest, widest volumes before you even touch a saw.
- Don’t skip the backing. It’s tempting to leave the back open for that “airy” look, but a solid back panel is what actually prevents the whole thing from leaning like a house of cards once you load it up.
- Account for “shelf sag” from the start. If you’re planning a long span without vertical support, you’ll need thicker wood or a center brace. Gravity is a constant, and it doesn’t care how much you like the aesthetic.
- Sand more than you think you need to. There is nothing more frustrating than finishing a project only to realize your fingers catch on every single edge. Smooth surfaces make cleaning much easier down the road.
- Plan for the weight. Books are deceptively heavy—much heavier than a collection of decorative knick-knacks. Build for the reality of a library, not the lightness of a showroom display.
The Finish Line (And What Comes Next)
At the end of the day, building this shelf isn’t about achieving some Pinterest-perfect woodworking masterpiece; it’s about creating a reliable system for your belongings. We’ve covered the essentials: selecting wood that won’t sag under pressure, measuring twice so you aren’t staring at a pile of expensive scrap, and ensuring those joints are actually structurally sound. If you followed the steps, you now have a piece of furniture that isn’t just a decorative afterthought, but a functional anchor for your room. It’s sturdy, it’s level, and most importantly, it’s exactly where you need it to be.
Now that the sawdust has settled and your tools are back in their proper places, don’t let the momentum stop here. There is a specific kind of quiet satisfaction that comes from looking at a corner of your home and knowing you were the one who fixed it. You didn’t just buy a box from a big-box retailer; you built a solution. Use this win to tackle the next small chaos in your space. Remember, life is far too short to live among things that are broken or poorly organized. Build it right, use it well, and then get back to the business of actually living your life.
Frequently Asked Questions
How do I figure out which wood is actually worth the money versus what's just going to warp in six months?
Look, don’t get seduced by the grain patterns in the showroom. If you want something that won’t bow the moment the humidity shifts, stick to hardwoods like oak, maple, or walnut. They’re an investment, sure, but they play nice over time. If you’re on a budget, avoid the cheap, thin construction pine—it’s prone to warping faster than a bad software update. If it feels light and flimsy in the hand, leave it on the shelf.
I don't have a workshop; can I realistically pull this off using just a few basic hand tools and a small workspace?
Absolutely. I’ve spent half my life tinkering with vintage synths on a kitchen table, so I know the struggle. You don’t need a dedicated workshop to build something functional. If you have a flat surface, a decent saw, and a way to clamp things down, you’re halfway there. Just keep your workspace tidy and do your measuring twice. It’s not about the square footage; it’s about having a controlled, organized spot to work.
What’s the best way to finish the wood so it looks clean but doesn't require a chemistry degree to apply?
Look, you don’t need a workshop full of specialized spray booths or a degree in polymer science. If you want a clean look without the headache, stick to a wipe-on poly or a high-quality hardwax oil. They’re forgiving. You just apply them with a lint-free rag, let it soak, and wipe off the excess. It’s tactile, it’s simple, and it protects the wood from actual life—like a spilled coffee or a heavy book.
How do I stop my heavy hardcover books from making the shelves sag over time?
Look, I’ve seen enough sagging shelves to know that “aesthetic” thin wood is a recipe for a disaster. If you’re loading up on heavy hardcovers, you have two real options: increase the thickness of your shelves or shorten the span. Don’t try to stretch a single board across four feet; it will bow. Add a vertical support or a solid wood cleat along the back wall. It’s not about looking pretty; it’s about physics.





