
I was halfway through a frantic Tuesday afternoon, trying to troubleshoot a server error while my laptop balanced precariously on a stack of old textbooks and a wobbly coffee table, when I realized I was done. Most people think learning how to build a desk requires a master’s degree in carpentry or a garage full of expensive, specialized power tools, but that’s a complete myth. In reality, a workspace shouldn’t be a high-maintenance project; it should be a reliable foundation that stays out of your way so you can actually do your job.
I’m not here to sell you on some Pinterest-perfect DIY fantasy that takes three weekends and a mountain of sawdust to achieve. Instead, I’m going to show you a streamlined, functional approach to building a workspace that is built to last and easy to assemble. We’re going to focus on sturdy materials, simple joinery, and a workflow that won’t leave you staring at a pile of useless wood. By the time we’re done, you’ll have a solid, professional surface that works as hard as you do, without the unnecessary complexity.
Guide Overview
Tools & Supplies
- Drill/Driver for fastening screws and hardware
- Circular Saw for cutting wood to size
- Measuring Tape for accurate dimensions
- Sandpaper for smoothing surfaces
- Wood Desktop (1 piece)
- Wooden Legs (4 pieces)
- Wood Screws (1 box)
- Wood Glue (1 bottle)
Step-by-Step Instructions
- 1. First things first, you need to stop guessing and actually measure your space. Grab that physical notebook I’m always talking about and write down the exact dimensions of where this desk is going to live. Don’t just eyeball it; account for the chair clearance and the reach of your arms. Once you have your numbers, source a solid wood slab or a thick butcher block—avoid those cheap particle board options that swell up and fall apart the moment you spill a coffee.
- 2. Next, we need to prep the surface. If you’ve bought raw wood, it’s going to feel like sandpaper if you don’t sand it down properly. Start with a lower grit (around 80) to get rid of any imperfections, then move up to 120, and finish with 220. I like to do this in small sections so I don’t lose track of where I’ve already been. It’s tedious, I know, but a smooth surface is the difference between a professional piece and a DIY disaster.
- 3. Now, let’s talk about the legs. You have two real choices here: you can build a trestle base if you’re feeling ambitious, or you can keep it simple and buy some high-quality steel hairpin legs or heavy-duty industrial legs online. If you’re going the DIY route, ensure your frame is perfectly square. If your base is even slightly off-kilter, your entire workspace is going to wobble every time you type, and that’s a sensory nightmare I wouldn’t wish on anyone.
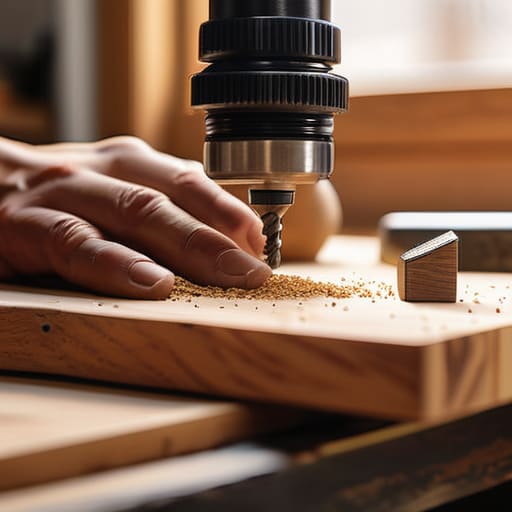
- 4. It’s time for the assembly, but please, for the love of all things functional, don’t over-tighten your screws. If you’re attaching legs to a wooden top, pre-drill your holes first. If you skip this step, you’re almost guaranteed to split the wood, which is a mistake you can’t really “hack” your way out of later. Use a level to make sure everything is sitting flat before you commit to the final tightening.
- 5. Once the structure is solid, you need to seal it. This is where most people get lazy, but a desk is a high-traffic zone. I prefer a matte polyurethane or a hard-wax oil; it protects against water rings and scratches without making the desk look like it’s coated in cheap plastic. Apply at least two thin coats rather than one thick, gloopy one. It takes longer to dry, but the finish will actually last.
- 6. Finally, we deal with the inevitable cable chaos. A desk isn’t just a flat surface; it’s an ecosystem of power bricks and charging cables. Before you call it finished, mount a cable management tray or drill a few discrete grommet holes into the back. If you don’t build a system for your wires now, you’ll spend the next six months untangling a nest of black spaghetti every time you move your laptop.
Forget the Fluff Choosing the Best Wood for Office Desks
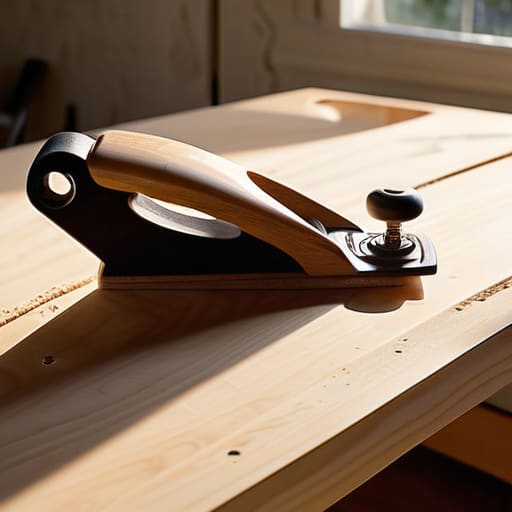
Look, you don’t need a masterclass in forestry to pick a tabletop, but you do need to stop falling for the “aesthetic” traps on Pinterest. If you’re looking for the best wood for office desks, my advice is to prioritize stability over vanity. I’ve seen too many people spend a fortune on expensive hardwoods only to realize their desk warps the first time the humidity shifts. If you want something that’s going to hold up under the weight of monitors and heavy books without breaking the bank, look toward birch plywood or even a solid pine. They are reliable, easier to work with if you’re just starting out, and frankly, they fit a minimalist desk design perfectly without the pretension.
If you’re on a tight budget, don’t feel like you have to settle for particle board that’ll crumble the moment you try to move it. You can find incredibly affordable desk materials at any local hardware store if you know what to look for. Stick to woods that have a tight grain; it makes the sanding process much less of a headache. My rule of thumb? If the wood feels flimsy or looks like it’s hiding a bunch of knots and cracks, walk away. You want a surface that feels intentional and solid, not something you’ll be troubleshooting six months from now.
Real Planning Over Pinterest a Custom Desk Dimensions Guide
Pinterest is great for inspiration, but it is a terrible blueprint. I’ve seen too many people spend a weekend sourcing expensive timber only to realize their “aesthetic” desk is six inches too shallow for their monitor or so high they’re working with their shoulders hunched up to their ears. Before you even touch your woodworking tools for beginners, you need to stop looking at pretty pictures and start looking at your own body. Grab that notebook I’m always talking about and measure your chair height, your elbow position, and the actual footprint of your hardware.
A good custom desk dimensions guide isn’t about following a standard; it’s about ergonomics that don’t leave you feeling like a pretzel by 3:00 PM. If you’re aiming for a minimalist desk design, remember that “less” often means “less surface area for your coffee mug to slide off.” I usually recommend a depth of at least 24 to 30 inches—anything less and you’ll be squinting at your screen constantly. Map out your workspace on a piece of graph paper first. It’s much easier to erase a pencil line than it is to resaw a piece of walnut because you forgot you needed room for your legs.
The No Nonsense Approach to How to Build a Desk
Look, I’ve seen enough “DIY” projects turn into expensive firewood to know where most people go wrong. They dive in headfirst without a plan, only to realize halfway through that they’ve built something that wobbles every time they type an email. If you want to avoid that, you need to embrace a bit of discipline before you even touch a saw. My philosophy is simple: don’t buy every gadget in the catalog. You don’t need a professional workshop; you just need a handful of reliable woodworking tools for beginners—a drill, a level, and a decent sander—and the patience to use them correctly.
The secret to a desk that doesn’t feel like a temporary fix is focusing on stability over aesthetics. While everyone is chasing those overly complex minimalist desk design ideas they saw on Instagram, I’m more interested in whether the legs are braced properly. If you’re working with a tight budget, don’t sweat it. You can find incredibly affordable desk materials at any local hardware store if you know how to look for them. Just remember: a slightly imperfect finish is fine, but a structurally unsound desk is a waste of your Saturday. Build it once, build it right, and then get back to your actual life.
Essential Woodworking Tools for Beginners and Affordable Desk Materials
Look, you don’t need a professional workshop or a massive budget to get this done. If you try to buy every gadget in the catalog, you’ll spend more on gear than on the actual lumber. For a solid start, focus on the essentials: a reliable drill, a circular saw (or a local shop that can make the cuts for you), a sander, and a decent tape measure. When it comes to woodworking tools for beginners, my rule is simple: if you aren’t going to use it at least three times, don’t buy it. Stick to the basics that prioritize accuracy over bells and whistles.
As for the build itself, your choice of affordable desk materials can make or break your sanity. You don’t need exotic hardwoods to achieve a high-end look. In fact, a thick piece of birch plywood or even a butcher block from a big-box store can look incredible once you’ve sanded it down and applied a matte finish. Avoid the temptation to go overboard with complex joinery; a clean, sturdy frame and a well-chosen top are all you need to support your gear. Keep it simple, keep it stable, and most importantly, make sure it actually stays level.
Five Ways to Keep Your Project from Becoming a Total Disaster
- Measure twice, cut once, and then measure a third time. I’ve seen too many people rush the math only to end up with a desk that wobbles like a newborn calf. If the numbers don’t make sense on paper, they definitely won’t make sense in your living room.
- Don’t skip the sanding. You can have the most expensive slab of walnut in the world, but if you leave it rough, you’re going to end up with splinters in your forearms every time you reach for your coffee. Smooth is functional; scratchy is a mistake.
- Plan for your cables before you commit to the build. There is nothing more frustrating than finishing a beautiful piece of furniture only to realize you have a chaotic nest of wires tangling around your legs. Drill your grommet holes or plan your routing while the wood is still in your hands.
- Invest in decent fasteners. I know it’s tempting to grab the cheapest box of screws at the hardware store, but cheap hardware fails. Use screws that actually grip and won’t snap when you’re trying to tighten them. Your desk needs to hold up your monitors, not just look pretty.
- Level your workspace before you start. If your workbench is uneven, your desk will be uneven. It sounds elementary, but trying to build a precision piece of furniture on a lopsided garage floor is a recipe for a headache you don’t need.
Done and Dusted
At this point, you should have a solid plan, the right materials, and a workspace that isn’t a complete disaster zone. We’ve covered everything from picking wood that won’t warp the moment you set a coffee mug down to getting your dimensions right so you aren’t hunching over like a question mark by noon. Remember, the goal wasn’t to win a woodworking competition or create a museum piece; it was to build a functional foundation for your daily life. If the edges are a little rough or a screw is slightly crooked, don’t sweat it. As long as the structure is sound and it serves its purpose, you’ve succeeded in solving the problem rather than just adding more clutter to your mental load.
Now that the sawdust is settling, take a second to actually sit in your new setup. There is a specific kind of quiet satisfaction that comes from working on something you built with your own two hands—something that actually fits your workflow because you designed it that way. Stop overthinking whether it’s “perfect” and just start using it. The best tools aren’t the most expensive ones; they are the ones that actually work when you need them to. Now, clear the scraps off your floor, grab a drink, and get back to the business of actually living.
Frequently Asked Questions
How do I make sure the desktop won't sag in the middle once I put my monitors on it?
The “sagging middle” is the quickest way to turn a weekend project into a headache. If you’re planning on mounting heavy monitors, don’t just rely on a thick slab of wood. You need structural integrity. Either add an apron—that’s a sturdy strip of wood running vertically under the desktop along the edges—or screw in some steel stiffeners. If you’re feeling lazy, a simple heavy-duty metal leg in the center works too. Just don’t skip it.
I’m not a pro—what’s the easiest way to get smooth, professional-looking edges without expensive machinery?
Look, you don’t need a $500 router to avoid looking like an amateur. If you’re working with dimensional lumber, grab a piece of 220-grit sandpaper and a sanding block. It’s tedious, but it works. Sand the edges at a slight 45-degree angle to “break” them—it softens the sharpness and makes them feel intentional rather than unfinished. If you have a few extra bucks, a cheap handheld router with a round-over bit is a game-changer.
How do I manage all the messy cables so they don't end up tangling around the legs?
Cable management is where most DIY projects go to die. If you let them hang, you’re just building a future headache. Start with a heavy-duty power strip mounted directly to the underside of your desk—don’t let it sit on the floor. Use adhesive cable clips or even simple Velcro ties to bundle cords together. If you’re feeling fancy, screw a wire mesh tray to the back; otherwise, just keep it tight, neat, and out of sight.
Do I really need to sand and stain this, or can I just use a quick way to protect the wood?
Look, I get it. You want to be at your computer, not wrestling with sandpaper for three hours. If you aren’t looking for a showpiece, skip the traditional stain. Grab a high-quality wipe-on poly or a hardwax oil instead. It’s much more forgiving and provides a solid protective barrier against coffee spills. You’ll still need a quick, light sand to smooth out the factory edges, but it’s a fraction of the effort.





