
I was staring at a stack of half-empty ceramic mugs and a pile of disorganized cookbooks, realizing my kitchen counters had become a graveyard for anything I didn’t want to put away in a dark cabinet. I knew I needed more vertical space, but every Pinterest tutorial I found made floating shelves diy look like some effortless, magical ritual involving nothing but a level and a dream. In reality, most of those “aesthetic” setups are one heavy vase away from a catastrophic structural failure. I’ve spent enough time troubleshooting broken systems—both in IT and in my own home—to know that if you don’t get the hardware right the first time, you’re just creating a future headache you’ll have to fix later.
Forget the flimsy, decorative nonsense that requires you to baby your belongings; we are going to build something actually functional. In this guide, I’m stripping away the fluff to show you how to execute a floating shelves diy project that prioritizes stability and clean lines. I’ll walk you through selecting the right brackets, finding your studs without losing your mind, and ensuring your new shelves can actually hold the weight of your real life.
Guide Overview
Tools & Supplies
- Drill/Driver for mounting brackets
- Level to ensure even placement
- Stud finder to locate wall supports
- Saw for cutting wood to size
- Sandpaper for smoothing edges
- Wood boards (2-3 pieces depending on length)
- Floating shelf brackets (1 set per shelf)
- Wood screws (1 pack)
- Wall anchors (if not hitting studs)
- Wood stain or paint (1 small can)
Step-by-Step Instructions
- 1. First, stop and look at your wall. You need to find the studs. I’ve seen too many people try to hang heavy books on drywall using nothing but plastic anchors, and it always ends in a shambles on the floor. Use a stud finder to mark exactly where those wooden beams are; if you don’t hit a stud, your shelf is basically just expensive wall art that won’t hold a single coffee mug.
- 2. Grab your wood and decide on your mounting style. Since we’re keeping this functional, I recommend the “cleat method” rather than those flimsy, pre-made floating shelf kits you see online. You’ll need two pieces of sturdy timber for the internal frame—one for the back and one for the bottom—and a thicker piece of wood for the outer “sleeve” that slides over the frame. Measure twice, cut once, because there is nothing more frustrating than realizing your shelf is a quarter-inch too short for the space you cleared.
- 3. Build your internal support frame. This is the skeleton of your project, and it needs to be rock solid. Screw your back cleat and your bottom cleat together to form an “L” shape. Ensure the corners are perfectly square using a carpenter’s square; if this frame is crooked, the entire shelf will look like it’s sliding off the wall, and no amount of “minimalist styling” will fix that.
- 4. Level it out and mount the frame. Hold your L-shaped frame against the wall, aligning it with your stud marks. This is where a spirit level is non-negotiable. Don’t eyeball it. Once you’re certain it’s straight, drive your screws through the back cleat directly into the studs. I prefer using heavy-duty wood screws that give me peace of mind knowing the weight won’t cause a structural failure later.
- 5. Prepare the outer sleeve. This is the piece of wood that hides the ugly brackets and makes it look like the shelf is magically hovering. Sand the edges until they are smooth enough to touch without catching a splinter. If you’re going for a clean, professional look, I suggest a matte finish or a simple stain; we want the shelf to serve the room, not compete with it for attention.
- 6. Slide the sleeve over the frame. Carefully slip your finished wood piece over the mounted cleats. If it’s a tight fit, don’t force it with brute strength—check your measurements and see where the friction is. Once it’s seated, use a few small finishing nails or even a bit of construction adhesive to secure the sleeve to the frame so it doesn’t shift when you actually start using it.
- 7. The final test. Before you go out and buy a curated collection of ceramics, put something of moderate weight on the shelf. Give it a gentle press to make sure there’s no bowing or creaking. Once you know it’s structurally sound, you can finally stop worrying about the construction and actually start using the space to organize your life.
Stop Chasing Trends Why Floating Shelves Diy Actually Works
Look, I see these Pinterest boards every day filled with “aesthetic” setups that look great in a filtered photo but fall apart the second you try to put an actual book on them. We don’t need more clutter disguised as decor; we need storage that performs. The reason I advocate for this project isn’t about following a fleeting interior design trend—it’s about the utility of vertical space. When you take the time to master mounting floating shelves to studs, you aren’t just decorating; you’re reclaiming surface area on your counters and desks that was previously wasted.
The secret to making this work long-term is ignoring the “fluff” and focusing on the structural integrity. If you want that seamless, high-end look without the designer price tag, invest your energy into sourcing high-quality hidden shelf brackets rather than cheap, plastic alternatives. It’s the difference between a shelf that looks like it’s hovering elegantly and one that’s sagging under the weight of a single ceramic mug. Stop chasing the “look” and start focusing on the load-bearing reality of your home. If it isn’t sturdy, it isn’t functional, and if it isn’t functional, it’s just more noise in your living space.
Ditch the Fluff Essential Woodworking Tools for Shelving Success
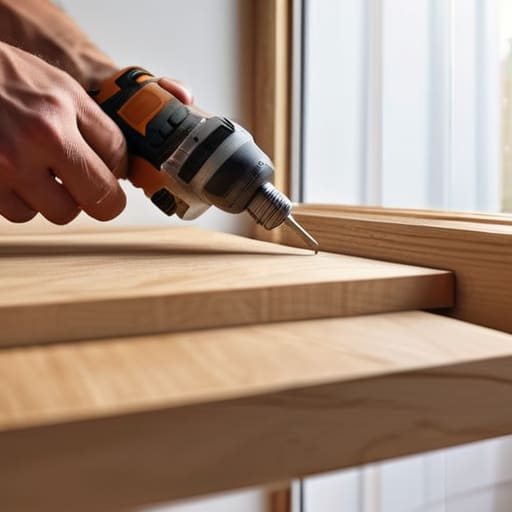
Look, you don’t need a professional workshop or a garage full of expensive machinery to get this right, but you do need to stop treating your tool kit like an afterthought. If you show up to a project with a dull handsaw and a cheap plastic level, you’re essentially asking for a headache. When it comes to selecting woodworking tools for shelving, prioritize precision over variety. A solid combination square and a decent cordless drill are your best friends here. If your measurements are off by even a fraction of an inch, that “minimalist” look you’re going for will quickly turn into a crooked mess that makes you wince every time you walk past it.
The real secret to a professional finish isn’t the wood itself; it’s how you handle the hardware. I’ve seen too many people attempt this project only to realize halfway through that they haven’t planned for the actual load. Before you even touch a piece of timber, make sure you have a reliable stud finder. Mounting floating shelves to studs is the only way to ensure your heavy cookbooks or ceramic vases don’t end up as floor debris. Don’t get distracted by fancy, expensive gadgets; just ensure your tools are sharp, your level is true, and your anchors are actually rated for the weight you intend to carry.
Built to Last Mounting Floating Shelves to Studs Properly
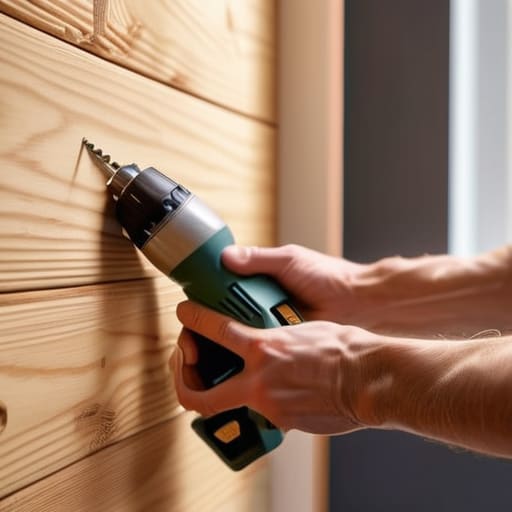
Look, I’ve seen too many “aesthetic” DIY projects end in a pile of shattered ceramics on the floor because someone thought a couple of plastic drywall anchors was enough to hold a heavy stack of cookbooks. If you want these to stay put, you have to stop treating your walls like they’re made of cardboard. The golden rule here is simple: mounting floating shelves to studs is non-negotiable. If your layout doesn’t align perfectly with your wall studs, don’t just wing it. Invest in a decent stud finder and take the extra ten minutes to map it out. If you absolutely cannot hit a stud, you’ll need heavy-duty toggle bolts, but let’s be honest—aiming for the wood is always the smarter, more stable play.
When you’re working with those sleek, hidden shelf brackets, the precision of your drilling determines whether the shelf sits flush or tilts like a sinking ship. I always keep my level handy—not just for the final look, but to ensure the bracket is dead-on before the first screw even touches the wall. If you’re planning on displaying anything heavier than a single succulent, treat your mounting process like a structural engineering task rather than a weekend craft. Build it once, build it right, so you aren’t troubleshooting a disaster next Tuesday.
Function Over Fads Modern Floating Shelf Designs That Hold Up
Look, I’ve seen enough “aesthetic” Pinterest boards to know that a shelf that looks good in a photo but sags under a single ceramic mug is a failure. When we talk about modern floating shelf designs, we aren’t talking about those flimsy, hollow boxes you see in big-box stores. If you want something that actually serves a purpose, you need to focus on the internal structure. I prefer a chunky, solid-wood approach because it provides the structural integrity required to actually hold your books or kitchenware without looking like it’s struggling for its life.
The real secret to a clean look isn’t just the wood choice; it’s how you handle the hardware. Using heavy-duty hidden shelf brackets is non-negotiable if you want that seamless, gravity-defying effect. But don’t get so caught up in the “invisible” look that you forget the physics. Before you start drilling, consult a basic shelf weight capacity guide for your specific wood type and bracket setup. It’s much better to spend ten extra minutes calculating your load limits now than to spend your Saturday afternoon picking heavy glass jars out of a pile of splintered oak. Keep it simple, keep it sturdy, and let the design do the heavy lifting.
Five Reality Checks Before You Start Drilling
- Stop obsessing over the “perfect” wood. Unless you’re displaying museum artifacts, a sturdy piece of pine or even high-quality plywood works just fine. Focus on the grain pattern and the finish, not the price tag per board foot.
- Measure twice, drill once, and then measure a third time. I’ve seen too many people rush the layout only to realize their “minimalist” shelf is sitting two inches too high to actually reach the books they want to read.
- Don’t trust your drywall. I don’t care how much you love the look of a shelf floating in the middle of a blank wall; if you aren’t hitting a stud or using heavy-duty anchors, that shelf—and everything on it—is going to end up on your floor.
- Plan for the weight of real life. We aren’t just decorating; we’re storing. If you plan on stacking heavy cookbooks or a collection of ceramics, your bracket system needs to be over-engineered for that load, not just “good enough” for a single succulent.
- Keep your hardware hidden, but don’t overcomplicate the mounting. The goal is a clean line that looks effortless, not a structural nightmare that took three weekends to install. If the mounting process feels like a massive project, you’ve overthought the design.
Get Out of the Planning Phase
At the end of the day, building floating shelves isn’t about achieving some Pinterest-perfect aesthetic that requires a professional stylist to maintain. It’s about the mechanics: choosing the right wood, ensuring your level is actually accurate, and—most importantly—securing those brackets into the studs so your collection of heavy cookbooks doesn’t end up in a heap on the floor. We’ve covered the tools, the mounting, and the design logic, so there’s really no excuse left for procrastination. If you focus on structural integrity over superficial trends, you’ll end up with something that actually serves a purpose in your home rather than just adding to the visual noise.
I know the idea of picking up a drill can feel like just another item on an already overwhelming to-do list, but I promise the payoff is worth the temporary mess. There is a specific kind of quiet satisfaction that comes from looking at a wall and seeing a system you built with your own hands—one that actually works when life gets chaotic. Stop overthinking the perfect placement and just start building. Once these shelves are up and your surfaces are clear, you’ll realize you haven’t just organized a room; you’ve reclaimed a little bit of your mental bandwidth. Now, go get to work.
Frequently Asked Questions
How much weight can these actually hold before they start sagging or pulling out of the wall?
Look, if you’re planning on turning these into heavy-duty book displays, let’s get real: it’s all about the studs. If you’ve hit the studs with long, structural screws, you’re looking at a decent 30–50 lbs per shelf. If you’re relying on drywall anchors alone? Don’t even try it with anything heavier than a small succulent. I’d rather have a shelf that stays put than one that ends up as a pile of debris on my floor.
Do I really need a stud finder, or can I just use heavy-duty drywall anchors and hope for the best?
Look, I’m all for cutting corners to save time, but “hoping for the best” is how you end up with a pile of shattered ceramics and a hole in your drywall. If you’re mounting anything heavier than a single dried flower, skip the anchors and find the studs. Drywall anchors are fine for light decor, but for real utility, you need that structural connection. Buy the stud finder; it’s cheaper than replacing your good dinnerware.
What’s the best way to hide the mounting hardware so the shelf actually looks like it's floating?
The secret isn’t magic; it’s just proper internal bracing. If you want that seamless look, stop trying to screw through the front. Instead, build a “cleat” system. You screw a sturdy wooden frame—the cleat—directly into your wall studs, then slide your hollowed-out shelf over it. Once the shelf is seated on the cleat, the hardware is completely swallowed by the wood. It’s cleaner, stronger, and saves you from the headache of visible brackets.
How do I prevent the wood from warping or cracking if I'm using reclaimed timber?
Reclaimed timber is beautiful, but it’s temperamental. If you don’t respect its history, it’ll fight you. First, let it acclimate to your workspace for at least a week so it can settle. When you’re prepping, don’t skip the sanding—you need to find the stable grain. Most importantly, seal every single surface, including the ends. If you leave the end grain exposed, it’ll suck up moisture like a sponge and crack right down the middle.





