I was halfway through a frustrating afternoon in my garage, staring at a pile of cedar scraps and a set of instructions that seemed written in a different language, when I realized something: most people make the process of learning how to build a birdhouse way more complicated than it needs to be. We’ve been conditioned to think we need a workshop full of expensive, specialized power tools and a degree in carpentry just to give a bluebird a place to sleep. Honestly? That’s just noise. You don’t need a high-tech setup or a masterclass to create something sturdy; you just need a few basic tools and a plan that actually makes sense when you’re standing there with sawdust in your hair.
In this guide, I’m stripping away the fluff and the over-engineered nonsense to show you a method that actually works. I’ll walk you through selecting the right wood, making the essential cuts, and assembling a structure that is built to last through wind and rain. No hype, no unnecessary gadgets—just a straightforward, functional approach to a weekend project that actually delivers a result you can be proud of.
Guide Overview
Tools & Supplies
- Handsaw or miter saw for cutting wood
- Hammer for assembling pieces
- Drill with small bits for pilot holes and entrance
- Tape measure for precise dimensions
- Untreated cedar or pine board (1" x 6" x 4')
- Galvanized nails (1.5 inch, small box)
- Wood glue (waterproof)
- Sandpaper (medium grit)
Step-by-Step Instructions
- 1. First, clear your workspace and gather your materials. You don’t need a professional-grade workshop for this, but you do need a piece of untreated cedar or pine—avoid pressure-treated wood because the chemicals are not exactly friendly to nesting birds. Grab a hand saw, a hammer, some galvanized nails, a drill with a spade bit, and a measuring tape. I always keep a pencil handy to mark my lines; there’s nothing more frustrating than measuring twice and still cutting wrong because you were eyeballing it.
- 2. Measure and mark your cuts on the wood. You’ll need six pieces: a base, a roof, a back, a front, and two sides. I find it helpful to map everything out on the board before the first cut is even made to minimize waste. Make sure your side pieces have a slight slope at the top so the roof can sit at an angle; this ensures rainwater actually runs off instead of pooling on top and rotting your hard work.
- 3. Cut the wood pieces according to your marks. If you’re using a hand saw, take your time and let the tool do the work—don’t try to force it through the grain, or you’ll end up with a jagged mess. Once you have your six pieces, give them a quick sand with some medium-grit sandpaper. You aren’t looking for a polished furniture finish here; you just want to remove the splinters so the birds (and you) don’t get snagged.
- 4. Drill the entrance hole in your front panel. This is the most critical measurement in the whole project. Depending on what kind of bird you’re hoping to attract, you’ll need a specific diameter—usually about 1.5 inches for bluebirds. Use a spade bit and drill slowly to prevent the wood from splintering. I also recommend drilling a few tiny drainage holes in the bottom piece to ensure the nest stays dry if any moisture manages to seep in.
- 5. Assemble the structure using your nails. Start by attaching the sides to the back, then the base, and finally the front. If you want to make cleaning easier later on, consider using screws for one of the side panels instead of nails; that way, you can unscrew it once a year to clear out old nesting material without destroying the whole house. Just make sure everything is flush and sturdy.
- 6. Attach the roof last, ensuring it has a healthy overhang. That overhang is your primary defense against the elements, acting like a little porch to keep the entrance dry. If you’re feeling particularly meticulous, you can add a small bead of exterior wood glue to the joints before nailing, but for a simple birdhouse, sturdy construction matters much more than a fancy aesthetic.
- 7. Find a mounting spot and hang it up. Don’t just nail it to a tree where a cat can reach it; try mounting it on a metal pole or a high corner of a fence. Place it in a spot that gets a mix of sun and shade, and make sure it’s tilted slightly forward to keep the rain out of the hole. Now, step back, put your tools away, and actually enjoy the fact that you built something useful with your own two hands.
Stop Overthinking It How to Build a Birdhouse That Actually Works
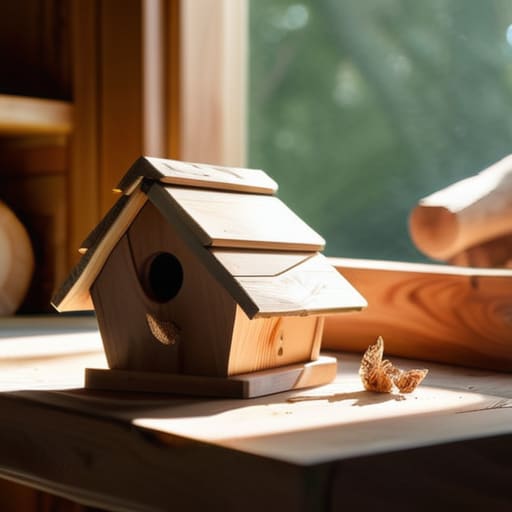
Look, you don’t need a masterclass in carpentry to do this right. The biggest mistake I see people make is trying to turn a simple backyard project into an architectural marvel. If you’re staring at a pile of lumber wondering which piece goes where, just remember: birds aren’t looking for aesthetics; they’re looking for a sturdy shelter. When choosing your materials, stick to the best wood for birdhouses, like cedar or redwood. These are naturally rot-resistant and don’t require you to go overboard with chemical treatments that might harm the hatchlings.
Once you have your pieces cut, don’t get hung up on perfection. If a joint isn’t perfectly flush, don’t sweat it—just make sure it’s secure. When it comes to the final touches, please, for the love of everything functional, skip the bright neon stains. If you feel the need to decorate, stick to safe birdhouse paint and finishes that are non-toxic and water-based.
Lastly, keep the “design” simple. If you’re targeting a specific neighbor like a bluebird or a wren, do a quick five-minute search for their specific birdhouse dimensions for specific species. Getting the hole size right is more important than having a decorative porch. Build it, hang it, and let the birds do the rest.
Picking the Best Wood for Birdhouses Without the Fluff
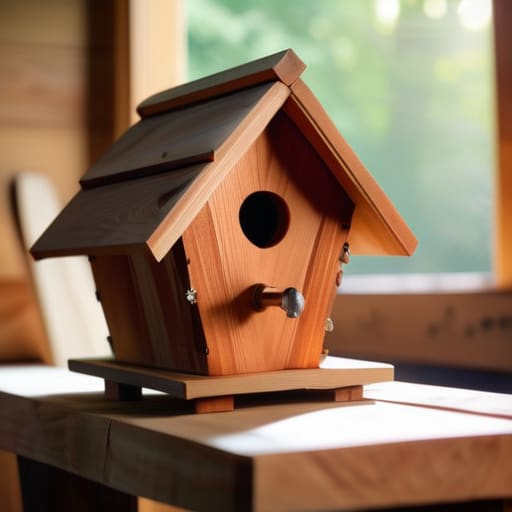
Look, I’ve seen too many people head to the hardware store and come back with pressure-treated lumber or cedar that’s been chemically stained into oblivion. If you want a birdhouse that actually serves its purpose, you need to keep it simple. The best wood for birdhouses is something naturally rot-resistant like cedar, redwood, or cypress. These woods can handle the rain and sun without needing a constant maintenance schedule. Avoid anything with heavy chemical treatments; those things are great for a deck, but they’re toxic to the very creatures you’re trying to invite into your yard.
If you’re working with something less hardy, like pine, just accept that you’ll be replacing it in a few seasons. That’s fine, as long as you aren’t treating it like a permanent monument. When it comes to the final look, please, skip the glossy varnishes. If you absolutely must decorate, stick to safe birdhouse paint and finishes that are specifically labeled non-toxic and water-based. Even then, I usually recommend leaving the interior raw. Birds don’t need a polished finish; they just need a dry, sturdy place to raise a family without breathing in fumes.
Essential Woodworking Tools for Birdhouses You Truly Need
Look, I’ve seen enough “DIY kits” to know they usually fail because they rely on cheap, flimsy hardware. If you want a birdhouse that doesn’t fall apart after the first heavy rain, you need to focus on a few reliable woodworking tools for birdhouses that actually do the heavy lifting. You don’t need a professional workshop, but please, skip the dull scissors or a dull utility knife. A decent, sharp handsaw and a cordless drill with a few pilot bits will save you more frustration than any expensive gadget. Using pilot holes is non-negotiable; if you try to drive screws directly into cedar or pine without them, you’ll split the wood, and your project is dead on arrival.
When it comes to the assembly, pay close attention to the process of attaching the birdhouse roof. I prefer using galvanized screws rather than nails. Nails tend to wiggle loose as the wood expands and contracts with the seasons, but a screw stays put. If you’re feeling particularly meticulous, a simple carpenter’s square is your best friend here. It ensures your edges are flush so you aren’t fighting gaps while trying to secure the pieces. Keep it simple, keep it sturdy, and don’t overcomplicate the kit.
From Attaching Birdhouse Roofs to Mounting a Birdhouse in Your Garden
When you get to the stage of attaching the birdhouse roof, don’t feel pressured to make it look like something out of a high-end architectural magazine. The goal is weatherproofing, not a design showcase. I prefer using galvanized nails or exterior-grade screws because they won’t rust and compromise the structure after the first heavy rain. If you’re using a pitched roof, ensure there’s a slight overhang to keep the entrance dry. And please, for the sake of the inhabitants, skip the toxic stains. If you absolutely must add color, stick to safe birdhouse paint and finishes that are water-based and non-toxic. I’ve seen too many people ruin a perfectly good project by using something that smells like a chemical plant.
Once the build is complete, the real work begins with mounting a birdhouse in your garden. This isn’t just about finding a pretty spot; it’s about placement strategy. I usually look for a location that offers a balance of shade and protection from predators. If you’re mounting it on a post, make sure it’s sturdy enough to withstand a gust of wind without wobbling like a loose circuit board. Aim for a height that keeps the entrance away from easy reach for cats or squirrels. It’s all about functional placement—if the birds feel exposed, they won’t move in, no matter how well-built the house is.
Five Rules of Thumb to Keep Your Birds (and Your Sanity) Intact
- Skip the perches. I know they look cute in those Pinterest photos, but they’re basically a handle for predators to hang onto while they raid the nest. A simple entrance hole is all your feathered neighbors need.
- Ventilation is non-negotiable. If you build a sealed box, you’re essentially building an oven. Drill a few small holes near the top of the side walls to let the heat escape, or you’ll cook the fledglings.
- Drainage is your best friend. Drill a few small holes in the bottom floor of the house. If rain manages to find its way in, you want it to drain out immediately rather than sitting there and breeding mold.
- Forget the paint on the inside. If you must decorate the exterior, keep it subtle and non-toxic. The interior should stay raw wood; birds don’t need the chemical scent, and it provides better grip for the little ones climbing out.
- Plan for easy cleaning. Don’t make it a permanent, sealed monument. Design one side or the roof to be easily removable or hinged so you can clear out the old nesting material once a season.
Getting It Done and Getting Out of the Way
At the end of the day, building a birdhouse isn’t about achieving architectural perfection or winning a woodworking competition. It’s about selecting the right cedar, using the tools you already have, and following a design that prioritizes function over form. We’ve covered the wood types, the essential hardware, and the mounting techniques needed to ensure your little project doesn’t just look good on a workbench, but actually survives a season in the yard. Once you’ve tightened those last screws and checked that the drainage holes are clear, your job is essentially done. You’ve built a reliable system for local wildlife, and that is more than enough.
My philosophy has always been that the best tools and systems are the ones that eventually become invisible. A good birdhouse shouldn’t demand your constant attention or require a maintenance schedule; it should just exist as a quiet part of your landscape. Now that the sawdust has settled and the tools are back in their proper places, step back and let nature take over the heavy lifting. You’ve done the work, you’ve solved the problem, and now you can finally get back to living while the birds move in.
Frequently Asked Questions
Do I really need to paint or stain the outside, or will that mess with the birds?
Keep it natural. If you can, leave the wood raw. Birds don’t care about your aesthetic, but they do care about chemicals. If you absolutely must finish the exterior for durability, use a water-based, non-toxic sealer and avoid anything with a strong odor. Whatever you do, never paint or stain the inside. That’s a nesting space, not a piece of mid-century modern furniture. Let’s keep the toxins out of their home.
How often should I actually be cleaning out the old nesting material?
Don’t turn this into a weekly chore; you’ll burn yourself out. Ideally, wait until the birds have actually vacated for the season. Once they’ve moved on, clear out the old nesting material and give the interior a quick scrub with a diluted bleach solution. If you notice a particularly messy nest or signs of parasites mid-season, you can intervene, but otherwise, let nature do its thing until the birds are gone.
Is there a specific height or spot in the yard where the birds will actually use it?
Don’t just nail it to the lowest branch you see. You want to aim for five to ten feet up. Any lower and you’re basically inviting cats and squirrels to a buffet. Find a spot that’s relatively quiet but has some natural cover nearby—like a thicket or a hedge—so they feel secure. Most importantly, face the entrance away from prevailing winds. If the weather is constantly battering the hole, they won’t bother moving in.
What's the deal with those little holes in the floor—are they necessary for drainage?
Yes, they are absolutely necessary. Think of them as the “drainage system” for your birdhouse. If rain manages to seep in through the roof or around the edges, those little holes prevent water from pooling on the floor. Without them, you’re essentially creating a damp, moldy petri dish that’s no way to treat your feathered neighbors. Drill a few small holes in the corners—keep it simple, keep it dry, and keep them safe.