
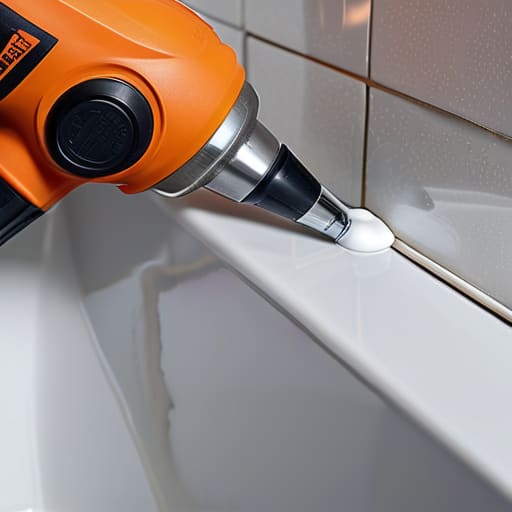
I was staring at a jagged, peeling mess of dried silicone around my kitchen backsplash last Tuesday, wondering why I’d spent forty dollars on a premium tube of sealant only to have it look like a toddler had been playing with frosting. Most people think that learning how to caulk is some high-level artisan skill reserved for contractors with specialized training, but that’s a total myth. The truth is, you don’t need a steady hand of a surgeon; you just need the right mechanical approach and a bit of patience to clean the surface before you even touch the nozzle.
I’m not here to sell you on some complicated “life hack” or a dozen expensive gadgets you’ll never use again. Instead, I’m going to show you how to get a clean, professional bead of caulk that actually stays put, without the unnecessary drama. We’re going to skip the fluff and focus on the functional basics: selecting the right material, prepping the gap, and the one trick I use to smooth everything out so it looks seamless. Let’s get this fixed so you can stop staring at that gap and get back to your life.
Guide Overview
Tools & Supplies
- Caulking gun for applying sealant
- Caulk removal tool or utility knife for cleaning old residue
- Wet rag for smoothing and cleaning excess
- Caulk tube (silicone or acrylic depending on surface)
- Painter's tape for clean edges
Step-by-Step Instructions
- 1. First, you have to clear the slate. If there is old, crusty caulk hanging on by a thread, you aren’t just layering new stuff on top of it—that’s a recipe for a total failure in six months. Use a putty knife or a specialized caulk removal tool to scrape out the old residue. If you’re feeling particularly stubborn, a utility knife can work, but don’t go hacking at your tiles; you’re trying to fix a leak, not create a new one.
- 2. Once the gap is empty, clean it like you mean it. Any leftover dust, soap scum, or moisture will prevent the new sealant from bonding, and once it fails, you’re back to square one. I usually grab a shop vac to suck up the debris, followed by a quick wipe with rubbing alcohol on a clean rag. Make sure the area is bone-dry before you even think about touching the caulk gun.
- 3. Now, prep your tool. If you’re using a standard caulk gun, cut the tip of the tube at a slight angle. You want the opening to be small enough to control, but wide enough to actually let the material flow. If you cut it too big, you’ll end up with a massive, messy glob that will take you an hour to clean up, and frankly, neither of us has time for that.
- 4. This is where most people lose their cool: the application. Hold the gun at a consistent angle and pull it toward you in one steady, continuous motion. Don’t try to “paint” it on with the nozzle; instead, let the pressure of the gun do the heavy lifting. It’s better to go a little too slow than to try and rush a bead that looks like a jagged mountain range.
- 5. If you’re looking at your bead and thinking, “Oh no, it’s a mess,” don’t panic. This is where the smoothing comes in. Dip your finger in a mixture of water and a tiny bit of dish soap—or use a dedicated smoothing tool if you want to be fancy—and lightly run it along the bead. You aren’t trying to smear it everywhere; you’re just shaping the profile so it sits flush against the surfaces.
- 6. Finally, step away and let it do its job. Most silicone-based sealants need at least 24 hours to fully cure before they can handle water. I know it’s tempting to test it with a showerhead five minutes later, but resist the urge. If you disturb it while it’s setting, you’ll ruin the seal and end up having to start the whole process over again.
Stop Patching Problems and Learn How to Caulk for Good
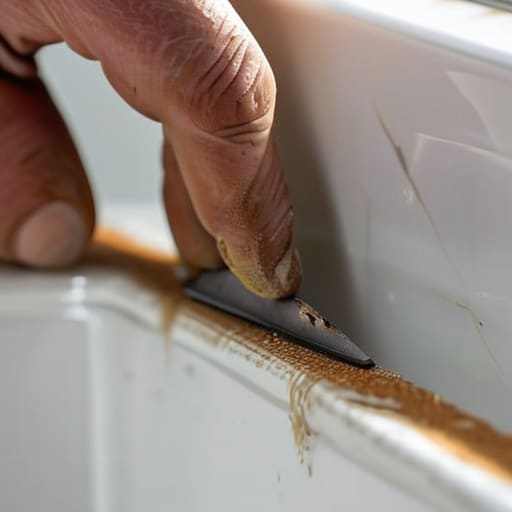
The biggest mistake I see people make isn’t the actual application; it’s trying to build something new on top of a crumbling foundation. If you don’t commit to the tedious part—removing old caulk entirely—your new bead will peel off within a month. I know, it’s a pain. It’s messy, it’s time-consuming, and it’s exactly the kind of thing we want to skip. But if you want to stop playing whack-a-mole with leaks, you have to scrape that old, moldy residue down to the bare surface first. Use a dedicated scraper or a utility knife, and for heaven’s sake, be patient.
Once you’ve actually cleared the deck, you need to pick your fighter: silicone vs acrylic caulk. If you’re caulking bathroom fixtures or anything that sits in a constant puddle of water, go with silicone. It’s waterproof and flexible, though it’s a bit more unforgiving if you mess up the placement. Acrylic is easier to clean up and better for sealing window gaps, but it lacks that heavy-duty water resistance. Once you’ve chosen, don’t skimp on your gear. A decent caulk gun makes a massive difference in how much control you have, ensuring you get a consistent, smooth caulk bead rather than a jagged mess that looks like it was applied during an earthquake.
Choosing Your Weapon Silicone vs Acrylic Caulk for Real Life
Before you even touch a tube, you need to decide which material you’re actually dealing with. In my experience, most people walk into a hardware store and grab the first thing they see, only to realize halfway through that they’ve bought the wrong tool for the job. If you’re caulking bathroom fixtures or anything that stays perpetually damp, silicone is your non-negotiable choice. It’s waterproof and flexible, which is vital when your house inevitably shifts a millimeter. The downside? It’s messy, and if you screw up, removing old caulk is a much bigger headache than I’d ever recommend on a Friday afternoon.
On the other hand, acrylic caulk (often called “painter’s caulk”) is much more forgiving. It’s easier to apply, cleans up with water, and is great for sealing window gaps or cracks in baseboards where moisture isn’t a constant threat. It’s also much easier to paint over, which is a lifesaver if you want a seamless look. Just remember: acrylic can crack over time if it’s in a high-movement area. My rule of thumb is simple: if it gets wet, go silicone; if it just needs to look pretty and stay still, stick with acrylic.
The Clean Slate Removing Old Caulk Without the Headache
Look, if you try to layer new caulk over the old, crusty stuff, you’re just asking for a disaster. It won’t bond, it’ll look amateur, and you’ll be back here in three months doing the exact same job. Removing old caulk is arguably the most tedious part of the process, but it’s the one part you can’t shortcut if you want a result that actually lasts. Grab a sharp utility knife or a specialized caulk removal tool from your caulking tool kit and start slicing along the edges of the joint. Don’t try to rush it; take your time to ensure you aren’t gouging the actual tub or tile underneath.
Once you’ve peeled away the bulk of the material, you’re going to find those stubborn, microscopic bits left behind. This is where most people give up, but it’s the most critical step for a professional-grade finish. Use a plastic scraper or even a damp rag with a bit of rubbing alcohol to clear out the residue. You want the surface to be completely bare and bone-dry before you even think about reaching for the caulk gun. If there’s any moisture or old residue trapped in the gap, your new bead will peel off like a bad sunburn. Clear the slate properly now, and you won’t have to troubleshoot this again next season.
Mastering the Smooth Caulk Bead and Essential Tool Kit
Before you even squeeze the trigger, let’s talk about your hardware. A cheap, flimsy caulk gun is the fastest way to turn a twenty-minute job into a frustrating hour of uneven globs. If you’re serious about doing this once and doing it right, invest in a decent, high-ratio gun that offers steady pressure. Your caulking tool kit should also include a few inexpensive plastic smoothing tools or even just a steady supply of painter’s tape. If you aren’t confident in your hand stability, taping off the edges of your tiles or baseboards is a total lifesaver—it gives you a hard line to work against and saves you from the nightmare of wiping away excess mess later.
When it comes to the actual application, the secret to a smooth caulk bead isn’t about how much pressure you apply, but how consistently you move. Don’t try to do the whole length in one go; work in small, manageable sections. I’ve learned the hard way that if you rush, you end up with ridges that look terrible and trap dirt. Once the bead is down, use a damp finger or a smoothing tool to press the material into the gap. You aren’t just spreading it; you’re sealing the joint to ensure it actually does its job.
Five Ways to Keep Your Caulk from Looking Like a DIY Disaster
- Don’t skip the cleaning. If you try to lay fresh caulk over old residue or soap scum, it’s going to peel off within a month, and you’ll be right back where you started.
- Use a spray bottle with soapy water. Once you’ve laid your bead, lightly misting it with a mix of water and a drop of dish soap helps your finger glide over the surface without dragging the caulk everywhere.
- Less is more. You don’t need a massive glob to get a seal; aim for a consistent, thin bead. Overloading the joint just creates a mess that takes longer to dry and looks amateur.
- Work in small sections. If you try to caulk an entire bathtub in one go, the first section will start skinning over before you even reach the end. Do it bit by bit to keep the material workable.
- Patience is a tool. It’s tempting to scrub the shower or run the tap immediately, but give it the full drying time specified on the tube. Rushing the cure is the fastest way to ruin your hard work.
Done and Dusted
At the end of the day, successful caulking isn’t about achieving some professional contractor’s level of perfection; it’s about the preparation and the right tools. If you took the time to strip away the old, crumbling mess and chose the right material—whether that was flexible silicone for the tub or a more forgiving acrylic for the baseboards—you’ve already won half the battle. Don’t let a slightly uneven line ruin your momentum. As long as you’ve maintained a continuous, watertight seal and avoided leaving air gaps where mold can take root, you have done exactly what was required to protect your home. It’s about functional reliability, not a showroom finish.
I know that looking at a messy bathroom or a leaky window can feel like just one more item on an endless to-do list, but there is a quiet satisfaction in actually fixing something with your own hands. Once that bead is smoothed out and the mess is wiped away, that problem is officially off your plate. You aren’t just sealing a gap; you are reclaiming your mental bandwidth from a nagging household annoyance. So, clean up your tools, put your notebook away, and go enjoy your evening. You’ve done the work, and now you can finally stop troubleshooting and start living.
Frequently Asked Questions
How long do I actually have to wait before I can get this area wet again?
Look, I know the temptation to test it with a splash of water is real, but patience is a functional necessity here. Most silicone caulks need at least 24 hours to fully cure before they can handle moisture. If you’re using something water-based like acrylic, you might get away with less, but I’d still give it a full day. Don’t rush the process; a premature splash is just asking for a leak later.
Is it normal if the caulk looks a bit uneven or bumpy right after I finish?
Look, take a breath. If you’re staring at a bumpy bead five minutes after finishing, you’re fine. Most caulks need time to skin over and settle. If it looks truly chaotic, you can usually smooth it out with a damp finger while it’s still wet, but don’t overwork it—that just creates a mess. If it’s dry and looks like a topographical map, well, that’s just a lesson learned for next time. It’s functional, not perfect.
Can I use the leftover tube for another project, or is it going to dry up and become useless?
Here’s the short answer: yes, but don’t just toss the cap back on and hope for the best. If you leave it in the garage for six months, it’ll be a useless brick. To keep it viable, wipe the nozzle clean, wrap the tip tightly in a bit of plastic wrap, and then screw the cap on hard. It’s not a foolproof system, but it’ll buy you enough time to finish that next project.
What’s the trick to fixing a mistake if I accidentally smear caulk where it doesn't belong?
Don’t panic—I’ve definitely smeared more than my fair share of silicone across a backsplash while distracted. If it’s still wet, grab a damp rag and wipe it away immediately. If it’s already started to skin over, grab a plastic putty knife or even an old credit card to gently scrape the excess off. Once it’s clear, wipe the area with a bit of rubbing alcohol to clean the residue so you can try again properly.





