
I was standing in my hallway last Tuesday, staring at a leaning stack of framed prints against the baseboard, feeling that familiar, low-grade itch of unresolved chaos. I had the tools, I had the art, and I certainly had the motivation, yet I was still paralyzed by the fear of putting a single hole in my drywall. Most people think learning how to hang a picture requires a degree in architecture or a professional contractor, but that’s just a recipe for procrastination. The truth is, the barrier isn’t your lack of skill; it’s the mental clutter of overcomplicating a five-minute task into a weekend-long ordeal.
I’m not here to sell you on some fancy, expensive laser-leveling system that you’ll use exactly once before it gathers dust in the garage. Instead, I’m going to show you how to master the basics so you can stop staring at blank walls and start actually living in your space. We’re going to cover the essential hardware, how to avoid the dreaded crooked frame, and the few simple measurements that make everything look intentional. Let’s get this done properly so you can put the hammer away and get back to your life.
Guide Overview
Tools & Supplies
- Hammer for driving nails or hooks
- Pencil for marking placement
- Tape measure for accuracy
- Level to ensure straightness
- Picture frame 1 unit
- Wall nail or screw 1-2 units
- Picture hanger/hook 1 unit
Step-by-Step Instructions
- 1. First, clear a space on the floor or a table and lay out your tools. You’ll need a level, a pencil, a hammer, and whatever hanging hardware you’ve picked up. I always keep a small dedicated kit for these kinds of tasks so I’m not hunting through a junk drawer halfway through the job.
- 2. Decide exactly where the art is going, but don’t just eyeball it. Hold the piece up against the wall and step back—really step back—to check the sightlines. Once you’re happy, use your pencil to mark the spot where the top of the frame will sit, but keep in mind that the actual hanging point is usually a few inches lower due to the wire or bracket.
- 3. Measure the distance from the top of the frame to the hanging hardware on the back. If it’s a wire, pull it taut toward the top of the frame with your finger to get an accurate measurement. This is where most people mess up; if you don’t account for that gap between the wire and the frame, your masterpiece will end up much lower than you intended.
- 4. Mark your final hanging point with a small, precise dot using your pencil. If you’re dealing with something heavy, this is the moment to decide if a simple nail will do or if you need to break out the wall anchors. Trust me, there is nothing more frustrating than a heavy frame slowly sliding down the wall because you were too optimistic about the drywall’s strength.
- 5. Level your mark. Even if you think your walls are straight (they almost never are), use your level to draw a light, horizontal guide line. This ensures your art doesn’t look like it’s trying to escape to one side of the room, which is a subtle visual distraction that will drive you crazy every time you walk past it.
- 6. Drive your nail or screw into the mark. If you’re using a hammer, aim for a slight downward angle; it creates a much more stable anchor for the hardware to sit in. Do it firmly but steadily—you want the hardware in the wall, not a new dent in your floorboards.
- 7. Hang the piece and perform the final level check. Once it’s on the hook, place your level on top of the frame to confirm it’s perfectly straight. If it’s just a hair off, don’t sweat it—just tweak it by hand until it looks right to your eye. Now, step back, put your tools away, and actually enjoy the view.
Stop Staring at Empty Walls How to Hang a Picture Simply
Before you start driving holes into your drywall, let’s talk about the “why” behind the placement. I’ve seen too many people hang a piece of art too high, making the whole room feel disjointed and awkward. When you’re measuring for art placement, aim for eye level—roughly 57 to 60 inches from the floor. If you’re hanging something above a sofa or a sideboard, leave about six to eight inches of breathing room between the bottom of the frame and the furniture. It’s about creating a sense of intentionality, not just filling a void.
Once you’ve found the spot, you need to decide on your battle plan for the actual attachment. If you’re dealing with a lightweight print, command strips vs nails is the age-old debate; strips are great for renters, but if you want something that won’t budge, a classic nail is still king. However, if you’re hanging heavy mirrors or oversized canvases, don’t get creative—get sturdy. Invest in proper wall mounting hardware types like heavy-duty anchors. It’s much easier to spend five minutes picking the right screw now than it is to spend an afternoon patching holes and repainting later.
Measuring for Art Placement Without the Mental Math Headache
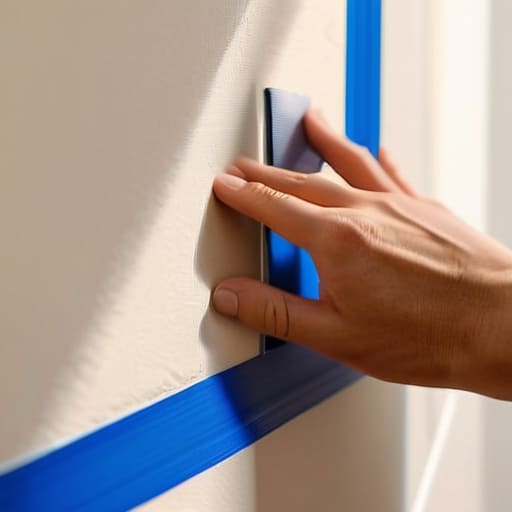
The biggest mistake I see people make isn’t using the wrong tool; it’s trying to eyeball the height and ending up with a gallery that looks like it’s slowly sliding toward the floor. We’ve all been there—you step back, squint, and realize the piece is either way too high or awkwardly low. To avoid that “why did I do this?” feeling, stop guessing. I always use a piece of painter’s tape to mark the corners of where the frame will actually sit. It’s a low-stakes way of measuring for art placement before you ever commit to a single hole in the drywall.
If you’re dealing with something substantial, like hanging heavy mirrors, your approach needs to shift from “visual preference” to “structural reality.” This is where you stop being an artist and start being an engineer for five minutes. Check your wall type first—drywall is one thing, but if you’re hitting studs or masonry, your hardware choice is non-negotiable. I’ve spent more time than I’d like to admit correcting crooked frames because someone rushed the leveling process. Grab a spirit level, find the center point of your tape mark, and actually take the time to ensure it’s true. It’s much easier to spend thirty seconds leveling now than thirty minutes trying to fix a tilted masterpiece later.
Wall Mounting Hardware Types Choosing Tools That Actually Work
Look, the hardware store aisle is designed to make you feel like you need a PhD in structural engineering just to put up a landscape print. It’s overwhelming, but let’s simplify things. If you’re dealing with lightweight frames or posters, don’t even bother with a drill. The debate of command strips vs nails usually comes down to your long-term plans; strips are great for renters who are terrified of avoiding wall damage, but if you’re planning to swap that art out next month, a classic finishing nail is your best friend. It’s fast, it’s reliable, and it leaves a hole so small you can hide it with a tiny dab of toothpaste if you absolutely have to.
However, the stakes change when you move into the territory of hanging heavy mirrors or large, ornate wooden frames. This is where “winging it” becomes a recipe for a broken mirror and a very expensive repair bill. For anything substantial, skip the tiny nails and grab some heavy-duty picture hooks or even actual wall anchors. I always keep a small stash of assorted wall mounting hardware types in my junk drawer so I’m not running back to the store mid-project. Just match the weight of the object to the rating on the package. It’s not about being fancy; it’s about making sure your stuff actually stays on the wall where it belongs.
Command Strips vs Nails Avoiding Wall Damage for Good
Here is the reality: your choice between Command Strips and nails usually comes down to how much you value your security deposit versus your sanity. If you’re in a rental or dealing with delicate wallpaper, Command Strips are a godsend for avoiding wall damage. They’re great for lightweight frames and posters, but let’s be honest—they aren’t foolproof. I’ve seen more than one “damage-free” strip fail because someone skipped the most important step: cleaning the wall with rubbing alcohol first. If there’s even a hint of dust or oil on that surface, the adhesive is basically just expensive wallpaper.
On the other hand, if you’re hanging heavy mirrors or substantial wooden frames, stop playing games with adhesive and just grab a hammer. Nails and screws provide a mechanical connection that doesn’t rely on chemical bonds. While the thought of a tiny puncture in the drywall makes some people twitch, a small nail hole is a five-second fix with a bit of spackle. When it comes to the debate of command strips vs nails, I always follow a simple rule: if the item weighs more than a standard hardcover book, go with the hardware. It’s better to patch a tiny hole than to spend your Saturday morning fishing a shattered frame out of the carpet.
Five Ways to Stop the "Is It Level?" Panic
- Use a laser level if you have one, but if you’re stuck with a bubble level, don’t trust your eyes—they’ll lie to you once you step back three feet.
- Put a tiny bit of poster tack or a piece of painter’s tape on the bottom corners of the frame to keep it from shifting every time someone slams a door.
- If you’re hanging a heavy piece, skip the single nail and go for a picture wire or two separate hooks; spreading the load is just common sense.
- Test your height before you hammer. Hold the frame against the wall at eye level, mark the spot with a pencil, and step back to see if it actually looks right in the room.
- Keep a small “wall repair kit” in your junk drawer—a bit of spackle and a sanding sponge—so a rogue nail mistake doesn’t turn into a weekend-long renovation project.
Done and Dusted
At the end of the day, hanging a picture isn’t about achieving museum-grade perfection; it’s about making a choice and committing to it. You’ve picked your hardware, you’ve done the mental heavy lifting of measuring for eye level, and you’ve decided whether you’re going the permanent nail route or the damage-free Command strip route. Once you have those tools in hand and a clear plan of action, the actual execution is just a matter of steady hands and a bit of patience. Don’t let the fear of a tiny, fixable hole stop you from actually finishing the room. If it’s slightly crooked, you can nudge it. If you used the wrong screw, you can replace it. The goal was to stop the indecision, and you’ve officially done that.
We spend so much of our lives troubleshooting small, nagging tasks that end up draining our mental bandwidth. A blank wall is just another item on your mental to-do list, a constant visual reminder of a project that isn’t quite “done.” By following a simple, functional system, you’ve turned a potential afternoon of frustration into a quick win. Now, step back, put your notebook away, and actually enjoy the space you’ve created. Your home should be a place where you live, not a gallery of unfinished business.
Frequently Asked Questions
How do I keep the picture from hanging crookedly once it's actually on the wall?
The “one-and-done” approach is how you end up with a tilted masterpiece. Once it’s up, don’t just walk away. Use a bubble level—yes, a real one, not a phone app—to check the horizontal line. If you’re hanging a heavy frame, use two hooks instead of one; it stabilizes the weight and makes micro-adjustments much easier. If it’s still drifting, a tiny bit of poster tack on the bottom corners works wonders.
Is there a way to hang heavy mirrors or large frames without drilling massive holes in my drywall?
Look, I get it. The thought of a massive hole in your drywall is enough to make anyone hesitate. If you’re dealing with something heavy, skip the flimsy adhesive strips—they’re a recipe for broken glass and a headache. Instead, look into heavy-duty picture hooks or, better yet, toggle bolts. They distribute the weight more effectively and, if you ever decide to move the mirror, the repair is a five-minute patch job rather than a construction project.
I live in a rental; is there any way to hang art without losing my security deposit?
The short answer is yes, but you have to be strategic. If you’re looking to avoid those dreaded “damage fees” when you move, skip the heavy-duty anchors and lean heavily on Command Strips—just make sure you follow the removal instructions to the letter. If the art is heavier, try using small finishing nails; they leave tiny holes that are a breeze to patch with a bit of spackle. It’s much cheaper than a professional wall repair bill.
How do I figure out the right height if I'm hanging art above a piece of furniture like a sofa or a sideboard?
The golden rule is to avoid the “floating art” look—don’t hang it so high that it looks like it’s trying to escape the ceiling. Aim for about 6 to 10 inches above the top of your sofa or sideboard. You want the piece to feel connected to the furniture, like they’re part of the same visual unit. If the gap is too wide, the whole arrangement just feels disjointed and messy.





