I’m tired of seeing “gourmet” recipe blogs treat a simple bag of dried legumes like they’re some kind of delicate, high-maintenance laboratory experiment. You don’t need a $500 pressure cooker or a degree in culinary arts to master how to cook beans and lentils; you just need to understand the basic physics of water and heat. I spent way too many years in my twenties trying to follow “life hacks” that involved expensive specialty salts and precise timing, only to end up with a pot of mush or, worse, something that felt like chewing on gravel. It’s a massive waste of mental bandwidth that we simply don’t have.
Here is my promise: I am going to strip away the fluff and give you the actual, functional mechanics of the process. We aren’t going to chase trends or buy unnecessary gadgets. Instead, I’ll show you the reliable, repeatable systems for getting perfect texture every single time, whether you’re using a standard stovetop or a slow cooker. This is about building a foundation that works when you’re tired, busy, or just plain hungry. Let’s get into the practical side of things so you can stop troubleshooting your dinner and actually enjoy it.
Ditch the Life Hacks Real Ways to Cook Beans and Lentils
Most “hacks” you see online are just ways to make a simple process feel more complicated than it needs to be. You don’t need a specialized gadget or a twenty-step ritual to get decent results. If you’re looking at the debate of soaking dried beans vs no soak, my advice is to keep it functional: soak them if you have the time and want a more predictable texture, but don’t stress if you don’t. If you’re in a rush, a long soak isn’t the only path to success, though it can certainly help with preventing gas from beans if your digestive system is a bit sensitive.
Instead of chasing perfection, focus on the variables you can actually control. The biggest mistake I see is people treating every legume like it’s the same. You can’t cook a red lentil the same way you approach a kidney bean; the cooking times for different legumes vary wildly, and if you ignore that, you’ll end up with either mush or gravel. Stick to a reliable stovetop bean cooking method, keep an eye on the clock, and remember that patience is a better tool than any high-tech kitchen gadget. Once you master the timing, the rest is just adding flavor.
The Great Debate Soaking Dried Beans vs No Soak Reality
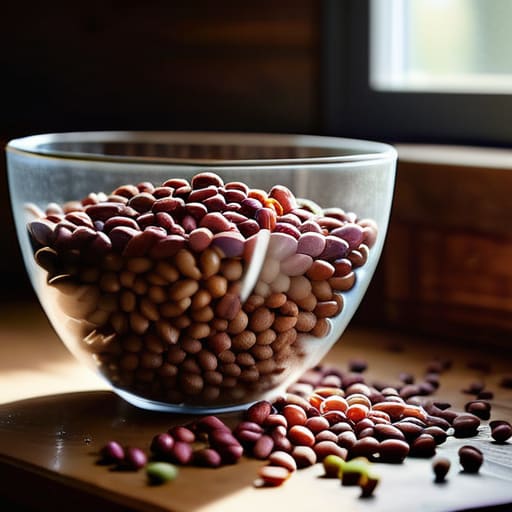
I’ve spent more hours than I care to admit staring at a pot of legumes, wondering if I’ve actually made a tactical error by skipping the overnight soak. The internet loves to make this sound like a high-stakes science experiment, but let’s look at the actual mechanics. When you’re weighing soaking dried beans vs no soak, you aren’t just deciding on texture; you’re deciding on your schedule. Soaking is the “slow and steady” approach—it softens the skins and can help with preventing gas from beans, which is a courtesy to everyone in your household. If you have the foresight to prep the night before, do it. It’s one less variable to troubleshoot later.
However, if you’re staring at a pantry of dried goods at 6:00 PM on a Tuesday, don’t panic. You don’t need to soak everything to get a decent result. A simple stovetop bean cooking method works fine if you just give them extra time and a bit of patience. If you’re truly short on time and want to bypass the drama entirely, a pressure cooker is your best friend here. It turns a multi-hour ordeal into a manageable task, though you’ll need to adjust your expectations for the exact cooking times for different legumes. Just remember: whether you soak or skip, don’t salt the water too early, or you’ll end up with beans that stay stubbornly tough.
Mastering the Clock Actual Cooking Times for Different Legumes
If you’ve ever sat staring at a pot of beans, wondering if they’re actually getting softer or if you’ve just wasted forty minutes of your life, you aren’t alone. The truth is that cooking times for different legumes aren’t just suggestions; they are a matter of structural integrity. Lentils are the easy wins here—red lentils can turn into a nutritious mush in about 15 minutes, while green or black lentils usually need 25 to 30. They are forgiving, which makes them perfect for those nights when your brain is too fried to follow a complex recipe.
Beans, however, require a bit more tactical planning. If you’re using the traditional stovetop bean cooking method, you’re looking at anywhere from 60 to 90 minutes depending on the age of the bean (and trust me, old beans are a nightmare). If you’re short on time and don’t want to deal with the guesswork, pressure cooker bean recipes are your best friend; they can cut that time down to a fraction of the original. Just remember: don’t start seasoning with salt or acidic ingredients like tomatoes too early, or you’ll end up with a pot of legumes that refuses to soften no matter how long you simmer them.
Reliable Methods the Classic Stovetop Bean Cooking Method
Look, if you want to avoid the frustration of unevenly cooked legumes, the stovetop is your most reliable tool. It’s not as fast as a pressure cooker, but it gives you a level of control that a timer simply can’t match. Start by placing your beans in a heavy-bottomed pot—cast iron or Dutch ovens are my go-to because they distribute heat evenly—and cover them with at least two inches of fresh water. I always advocate for a gentle simmer rather than a rolling boil; a violent boil can actually break the skins of the beans before the insides are tender, leaving you with a mushy mess.
While you’re waiting, don’t just let the pot sit there idle. This is where you build the flavor profile. While some people swear by adding salt at the beginning, I’ve found that adding it toward the end helps prevent the skins from toughening up. If you’re looking for the best spices for legumes, start with a bay leaf, a smashed clove of garlic, or a piece of kombu. If you’re particularly concerned about digestive discomfort, adding a pinch of asafoetida or a bit of ginger can be quite effective for preventing gas from beans. It’s about building a system that works for your body and your palate.
Fast and Functional Pressure Cooker Bean Recipes That Work
If the stovetop method feels too slow for your Tuesday night reality, the pressure cooker is your best friend. It’s the closest thing to a “fast-forward” button for legumes. I’ve found that using a pressure cooker effectively eliminates the whole soaking dried beans vs no soak debate. You don’t have to spend twelve hours waiting for a jar of chickpeas to soften; you can just throw them in, seal the lid, and let the physics do the heavy lifting while you actually finish your work or decompress.
The trick to making these pressure cooker bean recipes actually taste good—and not just like wet cardboard—is all in the aromatics. Don’t just cook them in plain water. Toss in a halved onion, a smashed garlic clove, and a bay leaf before you hit start. If you’re worried about the digestive aftermath, adding a pinch of asafoetida or a piece of kombu is a practical way of preventing gas from beans without needing a chemistry degree. It’s about building a system where the flavor happens automatically, so you aren’t standing over a pot troubleshooting the seasoning at the very end. Just set it, forget it, and enjoy the results.
Flavor Without the Fuss How to Season Lentils Right
Look, nobody wants a bowl of beige, flavorless mush. If you’re just boiling lentils in plain water, you aren’t really cooking; you’re just hydrating them. The mistake most people make is waiting until the very end to add salt or spices. By then, the lentil has already formed its structure, and the seasoning is just sitting on the surface like an afterthought. If you want depth, you have to build it into the process. I always recommend adding your aromatics—think smashed garlic cloves, a bay leaf, or a halved onion—right at the start of your stovetop bean cooking method. It’s a low-effort way to infuse the core of the legume with flavor while it simmers.
When it comes to how to season lentils for maximum impact, think about layers. If you’re going for something earthy, cumin and coriander are your best friends. If you want something brighter, a squeeze of lemon or a dash of apple cider vinegar at the very end can cut through the starchiness and wake everything up. I’ve also found that adding a small piece of kombu (dried seaweed) during the boil is a fantastic way of preventing gas from beans while simultaneously adding a subtle, savory umami note. It’s functional, it’s simple, and it actually tastes like real food.
The Essential Pantry Best Spices for Legumes You Need
Look, you don’t need a spice rack that looks like a chemistry lab to make these things taste good. If you’re staring at a pot of plain legumes, you’re missing the point. When I’m working through how to season lentils or hearty beans, I stick to a small, reliable toolkit. Cumin and smoked paprika are my non-negotiables; they provide that earthy, deep base that makes a simple bowl of dal or black beans feel like an actual meal rather than a side dish. If you want a bit of brightness, a pinch of turmeric or even some dried oregano can do the trick.
One thing I’ve learned from years of trial and error—and a few very unappetizing dinners—is that spices aren’t just for flavor; they can actually help with digestion. If you’re worried about the dreaded post-dinner bloat, adding a few pieces of kombu (dried seaweed) or a generous teaspoon of cumin can be quite effective for preventing gas from beans. It’s a small, functional tweak that makes the whole process much more sustainable. Don’t go overboard with the exotic blends right away; just master the basics, and you’ll have a system that works every single time.
Simple Fixes for Preventing Gas From Beans Every Time
Look, we need to address the elephant in the room: the bloating. There is nothing that ruins a perfectly good, nutritious meal like feeling like you’ve swallowed a lead weight an hour later. If you’re wondering about preventing gas from beans, the first thing to realize is that it isn’t a mystery to be solved with a magic pill; it’s about how you handle the chemistry of the legume itself.
The most effective fix starts long before the heat hits the pot. Whether you are debating soaking dried beans vs no soak methods, my advice is consistent: if you soak, you must discard that water. That liquid is where a lot of the complex sugars—the ones your gut struggles to process—are sitting. Don’t just rinse them; dump the soak water entirely and start with fresh, clean water for your actual cooking process.
Another pro tip is to lean into your spice cabinet. Adding aromatics like cumin, fennel, or even a piece of kombu seaweed to your pot can actually aid digestion. It’s not just about how to season lentils for flavor; it’s about using the best spices for legumes to make the meal more functional for your body. It’s a small, repeatable system that makes a massive difference in how you feel afterward.
The "Don't Screw It Up" Checklist: 5 Final Rules for Better Legumes
- Stop salt-stressing too early. While a little salt in the soaking water is fine, wait until the beans are nearly tender before doing a heavy seasoning. Adding salt too early can sometimes toughen the skins, leaving you with a pot of expensive, chewy pebbles.
- Use the “Fork Test,” not the timer. Every stove and every batch of dried beans is different. A timer is just a suggestion; a fork is a diagnostic tool. If the bean doesn’t yield easily to a gentle press, give it another ten minutes. Don’t trust the clock blindly.
- Keep your liquid levels realistic. Beans expand. If you’re cooking a large batch, make sure you have enough water or broth to cover them by at least two inches. There’s nothing more frustrating than realizing halfway through that you’ve run dry and now have a scorched pot to troubleshoot.
- Don’t toss the “bean liquor.” The liquid left over after cooking is gold. It’s thick, starchy, and full of flavor. Instead of pouring it down the drain, use it as a base for soups or to add body to a stew. It’s a free way to upgrade your texture.
- Cool them properly for meal prep. If you’re cooking beans ahead of time to use in salads or grain bowls, drain them and spread them out on a baking sheet to cool before refrigerating. If you toss them hot into a Tupperware container, they’ll steam themselves into a mushy, unappealing mess.
Stop Troubleshooting and Start Eating
At the end of the day, cooking beans and lentils shouldn’t feel like a high-stakes IT deployment. Whether you decide to soak your dried beans overnight to save time later, or you opt for the brute force of a pressure cooker to bypass the wait, the goal is the same: predictable results. Remember that seasoning is your best friend—don’t be afraid to use those pantry spices to build depth—and if you’re worried about the digestive aftermath, stick to the simple fixes we discussed to keep things manageable. Once you have a basic system down, you stop guessing and start executing with confidence.
My philosophy has always been that the best tools are the ones that get out of your way. You don’t need a complicated, multi-step gourmet recipe to make a pot of lentils feel like a win; you just need a method that works when you’re tired and the kitchen is a mess. Stop chasing the perfect “hack” and just master these fundamentals. Once you have the rhythm of the soak, the simmer, and the seasoning, you’ll find that you aren’t just making dinner—you’re reclaiming your evening from the chaos of mealtime decision fatigue. Now, go put a pot on the stove and get back to living.
Frequently Asked Questions
Can I use canned beans if I'm in a rush, or will they ruin the texture of my dish?
Look, if you’re in a time crunch, use the canned beans. Don’t let the “purists” make you feel like you’ve failed a culinary test. They won’t ruin your dish, but they do require a little troubleshooting. Drain them and give them a good rinse to wash away that metallic-tasting liquid. If you toss them straight from the can into a sauce, the texture can get mushy. Sauté them briefly first to give them some structural integrity.
How do I know if my beans are actually done without constantly poking them with a fork?
Stop the constant poking; you’re just bruising the texture. Instead, use the “smear test.” Take one bean out with a spoon, let it cool for a second, and press it against the side of your bowl or a plate. If it yields easily into a smooth paste without a grainy or chalky center, you’re golden. If there’s still a distinct “pop” or resistance, give them another ten minutes. Trust the texture, not the fork.
Is it worth it to use aromatics like onion and garlic in the cooking water, or is that just extra cleanup?
Look, if you’re asking about the cleanup, the answer is: it’s barely any extra work. Throwing a halved onion or a smashed garlic clove into the pot isn’t “extra” if you’re already cleaning a pot. It’s a low-effort, high-reward system. You aren’t just making them taste better; you’re building a flavor foundation that prevents that bland, heavy feeling. It’s one less thing to fix later with heavy salt or sauces. Do it.
Can I freeze cooked beans for later, and how do I keep them from turning into mush when I reheat them?
Yes, you absolutely can. In fact, freezing is the ultimate way to stop troubleshooting your dinner plans at 6:00 PM on a Tuesday. Just let them cool completely first—don’t go throwing warm beans into a container unless you want a science experiment. To avoid the mush factor, undercook them slightly before freezing. When you reheat them, do it gently on the stove rather than nuking them on high in the microwave. Keep it simple.